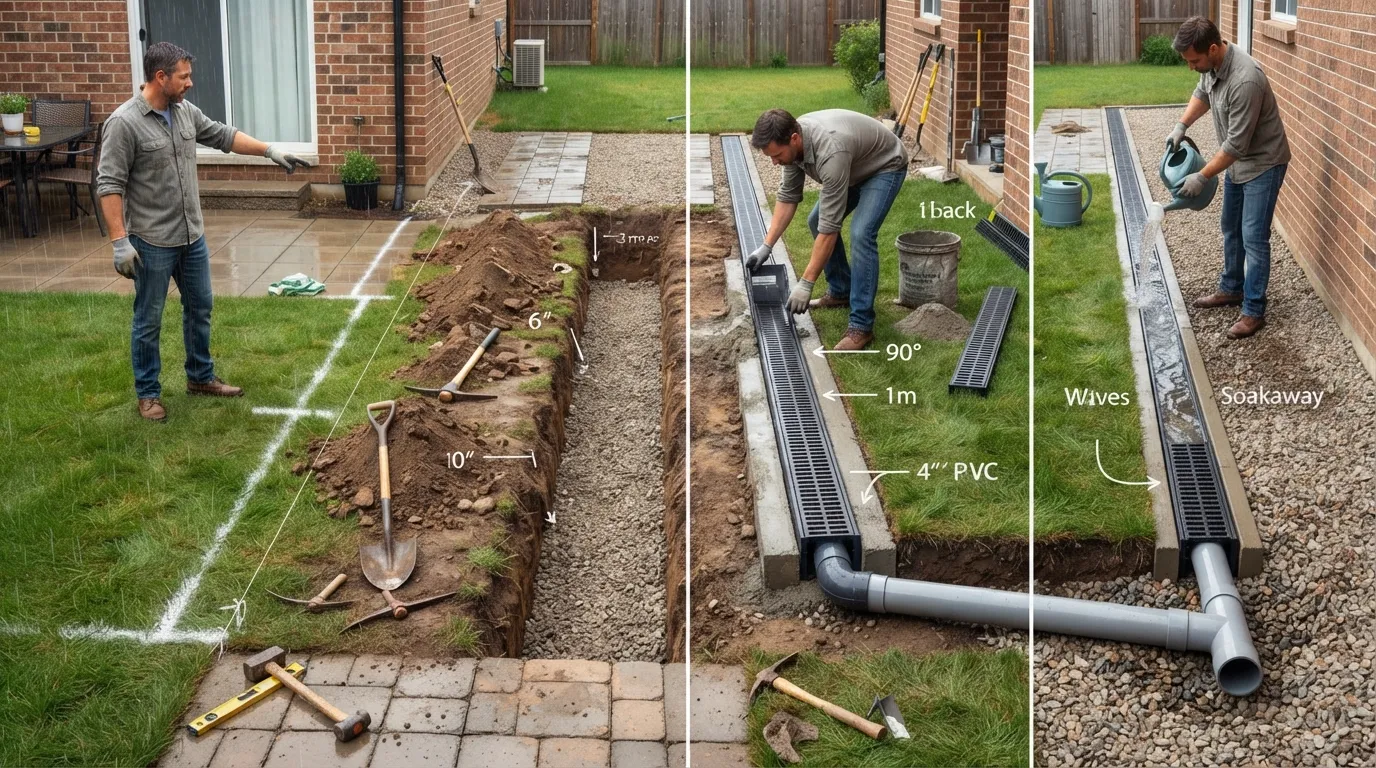
A DIY channel drain can be an effective way to capture surface water before it pools on a driveway, patio, walkway, yard, or in front of a garage. The physical installation is only part of the job, though. Before you dig, you need to know where the water is coming from, where the drain should sit, where the collected water will go, and whether the channel and grate can handle the traffic above it.
Direct answer: To install a channel drain yourself, identify the low point and safe discharge route first, choose a drain rated for the installation area, excavate the trench, prepare the required base, dry-fit the channel and outlet pipe, set the grate at the correct finished elevation, secure the system according to the manufacturer’s instructions, then test the entire water path before considering the job complete.
This guide walks you through that complete process. I will also show you when concrete is necessary, how to think about depth and slope, what changes for an existing concrete driveway, and which mistakes can cause a perfectly new channel drain to perform badly.
First: Do You Actually Need a Channel Drain?
A channel drain—also called a trench drain or linear drain—is designed primarily to intercept surface runoff. Water flows across the finished surface, enters a long grated channel, then exits through an outlet connected to a drainage pipe or another approved discharge system.
That makes a channel drain particularly useful when water repeatedly crosses a predictable line, such as:
- Across a driveway toward a garage
- Across a patio or pool-deck area
- Along a hardscape low point
- Across a walkway
- Along the edge of a paved surface
- Through a yard location where concentrated surface runoff needs to be intercepted
However, a channel drain is not automatically the best answer for every wet-yard problem.
30-Second Drainage Check
Choose a channel drain when:
You need to catch water moving across a driveway, patio, walkway, garage entrance, or another surface.
Consider a French drain when:
The bigger issue is saturated soil or water that needs to be collected below the surface rather than intercepted as runoff.
Consider grading or a swale when:
The landscape itself can be shaped to redirect surface water safely without installing a grated channel.
If your property has more than one drainage problem, it may help to first understand how the broader home drainage system works before treating one wet spot in isolation.
Before You Dig, Decide Where the Water Will Go
This is the step many DIY installations rush past.
A channel drain does not eliminate water. It simply captures it and transfers it somewhere else. If the outlet has nowhere appropriate to discharge, even a beautifully installed channel may still leave you with standing water or a backed-up system.
Think of the system as one continuous water path:
Runoff source → surface grade → channel drain → outlet → drain pipe → safe discharge point
Before buying materials, walk that complete route.
- Identify where the water currently comes from.
- Find the line where intercepting it will make the most sense.
- Locate the low point or planned drain position.
- Determine how the channel outlet will connect to the downstream pipe.
- Confirm that the downstream route can maintain the required fall.
- Choose a discharge point that is appropriate for your property and local requirements.
Depending on the site, a system may discharge to an approved daylight outlet, a suitable drainage area, a pop-up emitter, or another properly designed stormwater solution. Do not assume that moving water to a neighboring property, public right-of-way, sanitary sewer, or another convenient-looking location is allowed. Local requirements can differ, so verify the discharge plan before permanent installation.
Choose the Right Channel Drain for the Location
Do not choose a drain only by width, appearance, or price. A driveway channel has different demands from a drain crossing a pedestrian patio.
Think about two things before purchasing the system: where it will be installed and what will pass over it.
Do Not Buy the Drain Until You Know What Will Cross It
A grate that works well on a walkway is not automatically appropriate for a driveway. Before purchasing, consider whether the drain will see:
- Foot traffic only
- Bicycles or light equipment
- Passenger vehicles
- Pickup trucks or work vehicles
- Occasional heavier traffic
Use the manufacturer’s load information and installation detail for the exact system you choose. The load capacity is not determined by the grate alone; the channel body and the way the drain is supported in the surrounding surface also matter.
Tools and Materials for a Typical DIY Channel Drain
Your exact list will depend on the drain system and surface, but a typical installation may require:
Drainage Components
- Channel drain sections
- Removable grates
- End caps
- Outlet fitting or adapter
- Compatible discharge pipe
- Required elbows or connectors
- Manufacturer-approved joining materials
Excavation and Installation Tools
- Shovel and trenching tools
- Tape measure
- String line or marking tools
- Level or another elevation-checking tool
- Tamper for compacting the base
- Concrete tools if concrete is required
- Concrete saw and appropriate cutting equipment for an existing slab
- Personal protective equipment appropriate to the work
Base and Support Materials
- Compacted aggregate or gravel where specified
- Concrete where specified
- Pipe bedding as required
- Temporary tape or covering to protect the grate during messy work
Before excavation, identify underground utilities. In the United States, the 811 utility-marking system is commonly used before digging; follow the requirements that apply where you live.
How Deep Should a Channel Drain Be?
There is no single trench depth that is correct for every channel drain.
The required excavation depends on:
- The depth of the channel body
- The base or bedding required under it
- The required support around the sides
- The finished grate elevation
- The outlet position
- The depth and fall of the connected drainage pipe
A better way to think about depth:
Required trench depth = channel body depth + specified base/support + adjustment needed to place the grate at the correct finished elevation.
Measure the actual product before excavation and compare it with the manufacturer’s installation drawing. Do not dig to an arbitrary depth simply because another project used that measurement.
Understand the Three Different Slopes
One of the easiest ways to create a poor-performing drainage project is to treat every slope in the system as if it were the same thing.
There are actually three different elevations to think about.
1. Surface Slope
The surrounding driveway, patio, yard, or hardscape needs to direct runoff toward the channel. If the surface falls away from the drain, water may bypass it no matter how well the drain itself was installed.
2. Channel Position or Pitch
The channel itself must be installed according to the design of the selected system. Some products and layouts are installed differently from others, so do not automatically impose a slope copied from an unrelated project.
3. Outlet Pipe Fall
Once water leaves the channel, the connected pipe needs a workable route to the discharge point. The required pipe slope can depend on the pipe, drainage design, product instructions, and applicable local requirements.
How to Calculate a Required Drop
If a manufacturer or drainage plan specifies a percentage fall, the math is straightforward:
Required vertical drop = total horizontal run × specified slope.
For example, if a particular installation calls for a 1% fall over a 20-foot run, the drop would be 0.2 feet, or 2.4 inches. The example shows how to do the calculation; it does not mean 1% is automatically correct for every channel drain or outlet pipe.
Do You Need Gravel or Concrete Under a Channel Drain?
Sometimes you need concrete. Sometimes a manufacturer permits another type of prepared base. The answer depends on the product, surface, expected load, soil conditions, and installation detail.
Gravel beneath a channel is therefore not a universal yes-or-no requirement either. Use it when the specified installation calls for compacted aggregate or other bedding, but do not substitute loose gravel for required structural support.
How to Install a Channel Drain: Step by Step
Step 1: Watch the Water Before You Change Anything
If possible, observe the area during rain or reproduce the runoff carefully with water. Find where water originates, which direction it travels, where it slows down, and exactly where it begins to pool.
The best channel position is usually where it can intercept the moving water efficiently—not simply wherever excavation looks easiest.
Step 2: Plan the Complete Outlet Route
Mark the channel line and continue planning all the way to the discharge point. Confirm that pipes, fittings, elevations, and the outlet can physically work before you excavate the channel trench.
This is also the time to identify utility conflicts and other obstacles.
Step 3: Measure the Actual Channel System
Assemble or dry-fit several sections on the ground. Check:
- Total channel length
- Channel body depth
- Outlet location
- End-cap position
- Pipe adapter size
- Required base and side support
- Finished grate elevation
These measurements should drive your trench dimensions.
Step 4: Mark and Excavate the Trench
Excavate enough space for the channel body plus the support specified by the manufacturer. Dig the outlet-pipe route at the same time so you can confirm elevations before anything becomes permanent.
Keep the trench bottom reasonably uniform and avoid leaving loose, unstable material beneath the drain.
Step 5: Prepare the Base
Compact the required base material or place the specified concrete bedding. This step matters because a channel that settles after installation can create low spots, separated joints, cracked surrounding material, or poor grate alignment.
Step 6: Assemble the Channel and Outlet
Connect the channel sections, end caps, outlet adapters, and downstream pipe using materials compatible with the products you selected.
Dry-fit the complete system before making permanent joints whenever practical.
Step 7: Set the Finished Grate Elevation
The grate should sit at the elevation required to intercept runoff without becoming an unwanted bump or allowing water to bypass the drain.
Pay particular attention to the surrounding surface. A channel can be perfectly level and still fail if the driveway or patio directs water around it.
Step 8: Lock the Channel in Place
Once alignment and outlet routing are confirmed, secure the drain using the base, side support, or concrete encasement required for that system.
Keep the channel straight and stable while placing support material. Protect removable grates and channel openings from wet concrete, soil, or debris during installation.
Step 9: Finish the Surrounding Surface
Restore concrete, pavers, soil, grass, or other surrounding material so runoff reaches the grate rather than creating a new low point beside it.
Allow concrete and other curing materials to reach the required condition before exposing the area to traffic.
Step 10: Test the Whole System
Do not stop testing at the grate.
Introduce water upstream and verify the complete path:
- Water moves toward the channel.
- The grate captures the runoff instead of allowing it to bypass.
- Water travels through the channel toward the outlet.
- The outlet accepts flow without immediately backing up.
- The downstream pipe carries the water away.
- The final discharge location handles the flow as intended.
The Pre-Pour Test That Can Save You From Rework
If your installation will be locked into concrete, take extra time before the final pour.
Before Permanent Encasement, Verify:
- The full channel run is straight and at the intended elevation.
- Every section is connected correctly.
- End caps and outlets are installed in the right places.
- The downstream pipe reaches the intended discharge point.
- The pipe has the required fall.
- The grate elevation works with the finished surrounding surface.
- Water can actually travel from the collection area through the complete system.
A few minutes spent checking the entire assembly is much easier than cutting out cured concrete later.
How to Install a Channel Drain in an Existing Concrete Driveway
Retrofitting an existing slab is more involved because you first have to create enough space for the drain and its structural support.
The general process is:
- Confirm the channel position and downstream discharge route.
- Mark the concrete cuts using the dimensions required by the selected drain.
- Verify underground utilities before cutting or excavation.
- Use appropriate concrete-cutting equipment and protective gear.
- Remove the cut section of concrete.
- Excavate for the channel, support, outlet, and drainage pipe.
- Prepare the base.
- Dry-fit the complete drain and outlet connection.
- Set the channel at the correct finished elevation.
- Install the manufacturer’s required concrete support or encasement.
- Finish the surrounding concrete so runoff enters the grate cleanly.
- Allow the repair to cure as required before vehicle traffic returns.
How to Install a Channel Drain in Grass or a Yard
A yard installation may look easier because there is no slab to cut, but the water-path planning is just as important.
Pay special attention to:
- Whether runoff is actually concentrated enough for a channel to intercept it
- How surrounding soil will be graded toward the grate
- Whether the base can remain stable without settlement
- How the outlet pipe will cross the yard
- Where the water will discharge
- Whether erosion could develop near the outlet
If the yard is wet because water is moving through saturated soil rather than flowing across the surface, a channel drain alone may not solve the underlying problem.
Can You Make a DIY Channel Drain From PVC?
You may see homemade drainage channels made from PVC pipe cut lengthwise or other improvised materials. For a light, custom landscape project, a homeowner may be tempted to build something inexpensive rather than purchase a purpose-built channel system.
Before doing that, consider what a manufactured channel drain already solves:
- A removable grate
- Predictable outlet connections
- Cleanable interior access
- Section-to-section connections
- Known installation instructions
- Traffic and load information for appropriate products
A cut piece of PVC does not automatically provide those features. I would not treat a homemade PVC trough as equivalent to a purpose-designed driveway channel that will be crossed by vehicles.
7 Reasons DIY Channel Drains Fail
1. The drain is in the wrong place
The grate looks good, but the surrounding surface sends most runoff around it.
2. There is no workable outlet
Water enters the channel but has nowhere lower or appropriate to go.
3. Surface grade was ignored
The channel was installed correctly, but runoff never reaches it efficiently.
4. The channel settles or moves
Insufficient bedding or structural support allows the drain to shift after installation.
5. The wrong grate is used
A light-duty system is placed where vehicles or heavier loads cross it.
6. The outlet pipe becomes the bottleneck
The channel collects water faster than a poorly routed, clogged, or inadequate downstream path can move it.
7. Nobody plans for cleaning
Leaves, sand, sediment, and debris build up until flow through the channel or outlet slows.
Channel Drain vs. French Drain vs. Swale
These drainage methods solve different problems, so choosing the wrong one can lead to a lot of digging without fixing the actual water issue.
Some properties need more than one method. For example, a channel may intercept driveway runoff while a different drainage feature manages water elsewhere in the landscape.
What Is the Cheapest Drainage Method?
The cheapest effective solution depends on why water is collecting.
If a minor grading correction safely redirects surface runoff, reshaping the area may cost less than installing a channel. If water consistently crosses a paved driveway or garage entrance, however, a channel may be a better-targeted solution than repeatedly trying temporary fixes.
Do not choose a drainage method only because the materials are cheaper. A low-cost system installed in the wrong location can become more expensive once it has to be removed and rebuilt.
Channel Drain Maintenance After Installation
Once the drain is working, keep the grate and outlet path accessible. Surface drains naturally collect material carried by runoff.
Periodically check for:
- Leaves and organic debris on the grate
- Sand or sediment inside the channel
- Standing water after rain
- A blocked outlet
- A slow downstream drainage pipe
- Loose or damaged grate sections
- Settlement or cracking around the channel
If the channel itself is clean but water is draining slowly downstream, the problem may be farther into the drainage line. In that situation, professional drain cleaning may be more useful than repeatedly cleaning only the grate.
The First-Heavy-Rain Inspection
Your first real storm is the best performance test.
After the First Heavy Rain, Check These Five Things
- Does water actually reach the grate?
- Does any significant runoff bypass the ends or sides?
- Does the channel empty instead of holding standing water?
- Is the outlet flowing freely?
- Has anything shifted, settled, cracked, or loosened?
If water consistently misses the drain, the problem is usually not solved by installing a larger grate. Recheck the surface grade and the drain’s position relative to the runoff path.
When a Channel Drain Stops Being a Good DIY Project
Plenty of channel drain projects are manageable for an experienced DIYer, but some conditions make professional evaluation worthwhile.
Consider getting help when:
- You cannot identify an appropriate discharge point.
- The outlet would need to run uphill or through a difficult elevation change.
- You need to cut heavily trafficked or structural concrete.
- Underground utilities conflict with the proposed trench.
- Water may be entering from multiple sources that are not yet understood.
- The downstream drainage line is already slow, blocked, or damaged.
- You are unsure whether a channel drain, French drain, catch basin, grading change, or another solution is actually appropriate.
- The project involves significant vehicle loads and you are unsure about the required channel, grate, or structural support.
If you are in the Miami area and want the drainage problem evaluated before committing to excavation, you can learn more about Miami Florida Plumbing or speak with a local plumber about the situation.
Helpful Channel Drain Installation Video
If you prefer seeing the excavation, channel placement, outlet connection, and finishing process before starting your own project, this walkthrough provides useful visual context:
DIY Channel Drain FAQs
Can I build a concrete channel drain myself?
Yes, a capable DIYer can install a purpose-built channel drain in concrete, but the important part is not simply pouring concrete around a trench. You need the correct channel and grate, outlet route, finished elevation, structural support, and concrete detail for the expected traffic. Cutting an existing driveway also adds equipment and safety considerations.
How deep should a channel drain be?
There is no universal depth. The trench must accommodate the channel body, required bedding or support, the correct grate elevation, and the outlet connection. Measure the selected product and follow its installation drawing rather than copying an arbitrary trench depth.
Can I install a channel drain without concrete?
Some light-duty systems may permit installation on another properly prepared base, while traffic applications commonly have stricter structural requirements. Whether concrete is required depends on the specific drain, surrounding surface, load, and manufacturer instructions.
Do channel drains need to be set in concrete?
Not every channel drain installation is identical, but you should never assume concrete is optional in a driveway or traffic area. Use the installation method specified for the exact channel and expected load.
Do you need gravel under a channel drain?
A compacted aggregate base is appropriate for some systems and locations, but it is not a substitute for required concrete support. Follow the selected product’s bedding and encasement detail.
How do you make a drainage channel?
Start by identifying the runoff path and discharge point. Then create a trench for a purpose-built channel or another suitable drainage feature, prepare the required base, connect the outlet, set the finished elevation, secure the system, restore the surrounding grade, and test the entire water path.
Can a channel drain be installed in grass?
Yes, when surface runoff can be directed toward the channel and the drain has a stable base and workable outlet. If the problem is saturated soil rather than surface flow, investigate whether a different drainage method is more appropriate.
Can I make a channel drain from PVC?
It is possible to improvise a simple trough from PVC for certain low-load custom projects, but cut PVC should not automatically be treated as equivalent to a purpose-built channel drain. Manufactured systems provide grates, outlets, cleanout access, connection details, and load information that become especially important in driveways.
What is the most important part of a DIY channel drain installation?
Planning the complete water path. Before digging, make sure water can reach the channel, leave through the outlet, travel through the downstream pipe, and discharge somewhere appropriate. Installing the grate is only one part of a successful drainage system.
Final Channel Drain DIY Checklist
- Confirm that a channel drain matches the type of water problem.
- Observe the runoff path and identify the best interception line.
- Choose the discharge point before buying or digging.
- Select a channel and grate appropriate for the surface and traffic.
- Measure the actual product before deciding trench depth.
- Treat surface slope, channel position, and pipe fall as separate design questions.
- Follow the manufacturer’s base and concrete requirements.
- Dry-fit the full system before permanent installation.
- Test the outlet route before locking the channel into place.
- Finish surrounding surfaces so runoff reaches the grate.
- Inspect the drain during the first heavy rain.
- Keep the grate, channel, and downstream outlet accessible for cleaning.
A successful DIY channel drain is not simply a trench with a grate over it. It is a complete surface-water system. If you plan the runoff path first, choose the right drain for the load, respect the product’s installation requirements, and test the water from collection point to final discharge, you have a much better chance of solving the original pooling problem instead of moving it somewhere else.