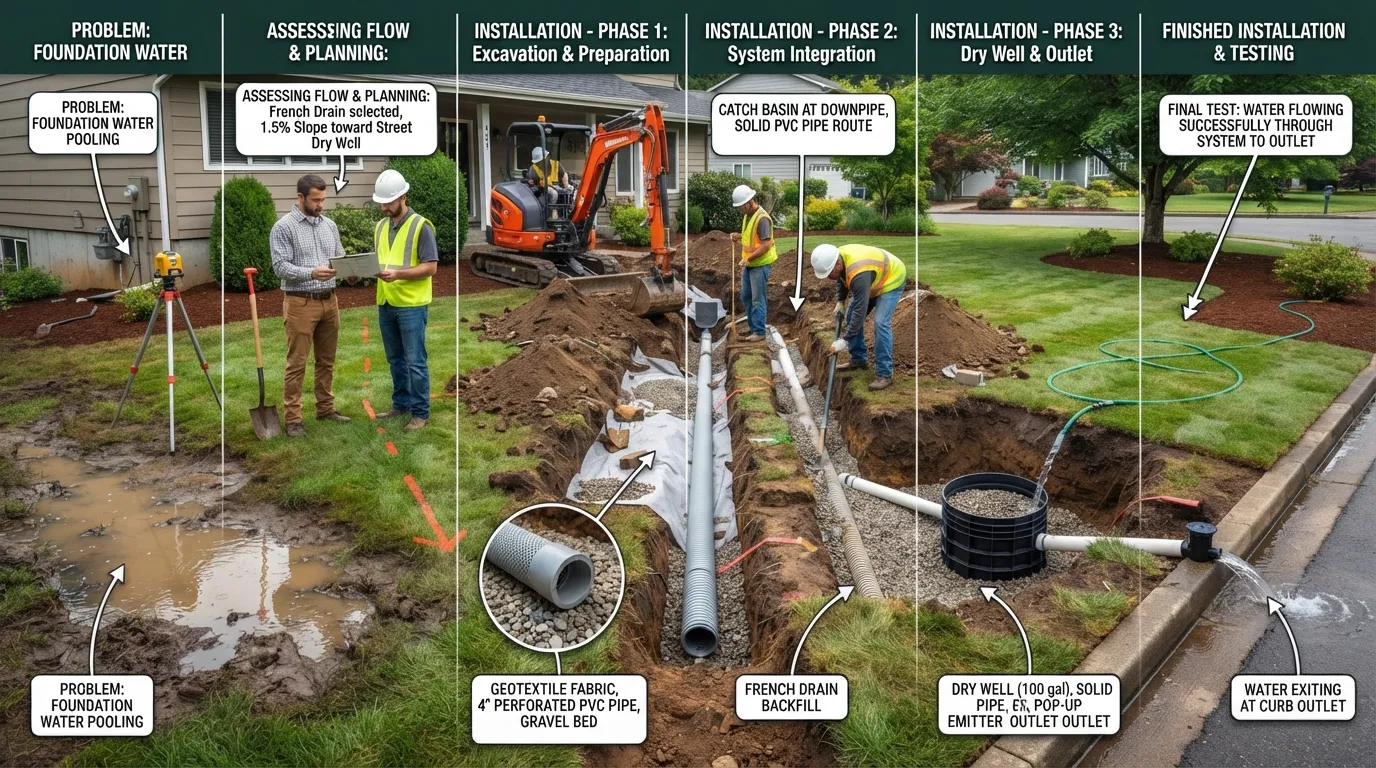
Drain construction is more than digging a trench and laying pipe. A drainage system has to collect the right type of water, move it along a workable route, and send it to an appropriate outlet without creating another water problem somewhere else.
If you are dealing with a wet yard, standing water, runoff across a driveway, saturated soil, or water collecting near a building, the first question should not be “How do I dig the drain?” It should be “Where is this water coming from, and where can it safely go?”
Drain construction is the planning and installation of a system that collects, carries, redirects, infiltrates, or disposes of unwanted water. The right construction method depends on whether you are managing surface runoff, subsurface water, roof drainage, a localized low spot, or sanitary wastewater. A French drain, channel drain, catch basin, dry well, and plumbing drain solve different problems.
What Is a Drain in Construction?
In construction, a drain is a component or system designed to move unwanted water away from an area where it could otherwise pool, saturate soil, interfere with a structure, or create drainage problems.
The word drain can describe several very different systems. That distinction matters because choosing the wrong one is one of the easiest ways to spend money without actually solving the water problem.
Surface drainage
Collects rainwater that is flowing or pooling on the ground, driveway, patio, or other surface.
Subsurface drainage
Manages water within saturated soil, often with a perforated pipe surrounded by drainage material.
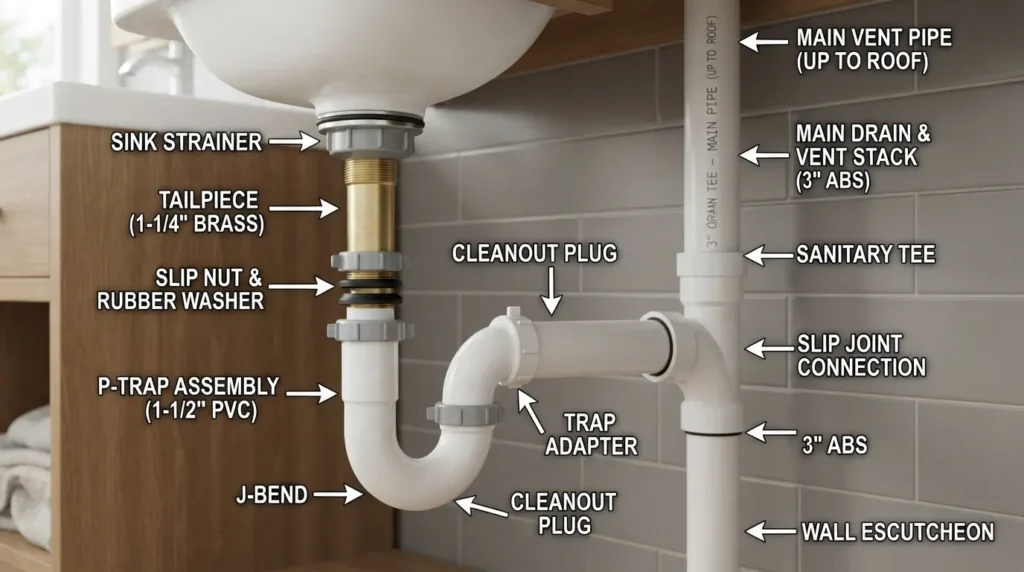
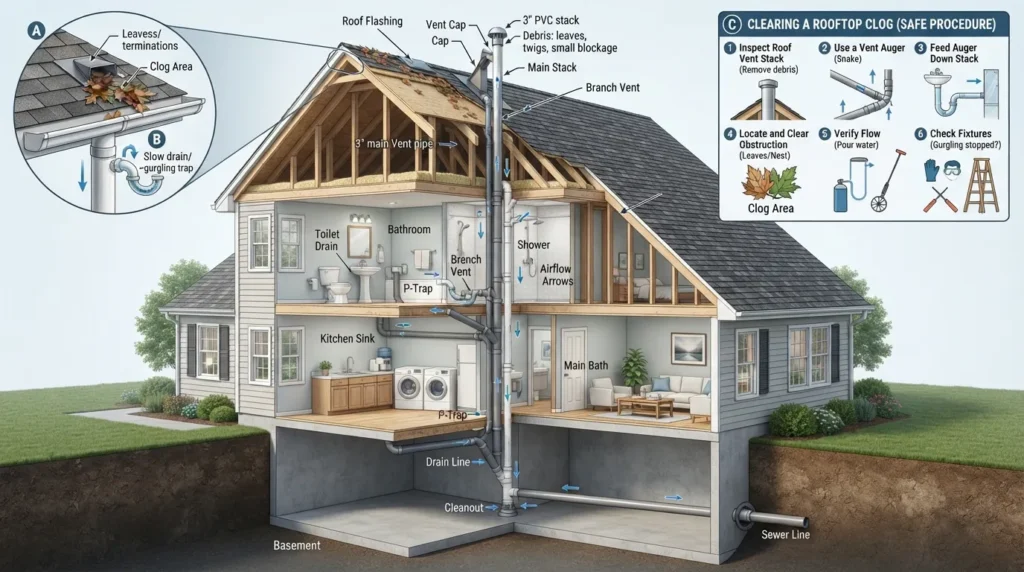
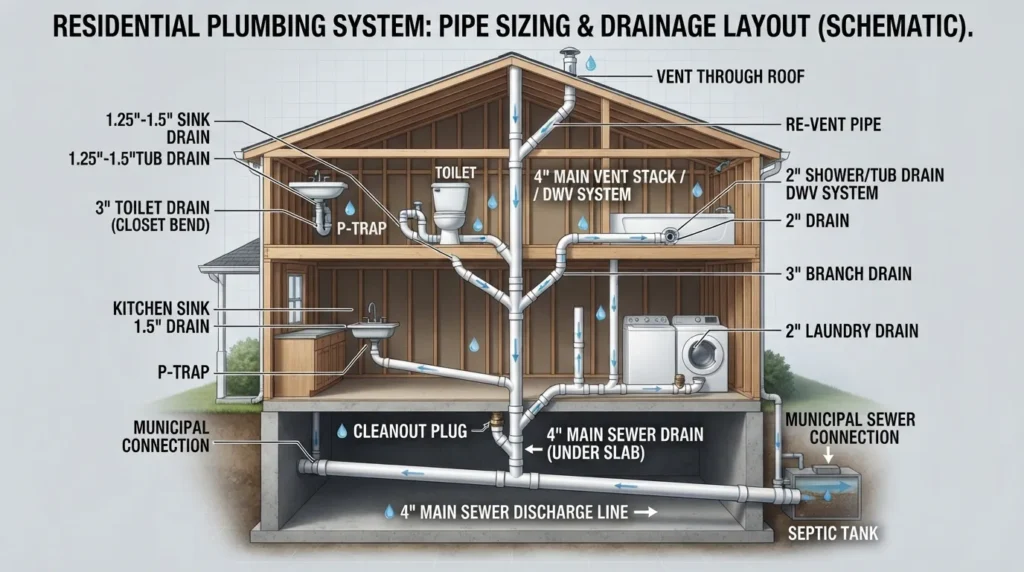
Sanitary drainage
Carries wastewater from sinks, showers, toilets, appliances, and other plumbing fixtures toward a sewer or onsite wastewater system.
If you want a broader explanation of sanitary, stormwater, subsurface, and other residential systems, see our guide to the home drainage system.
Start With the Water Problem, Not the Trench
A useful drainage plan starts with diagnosis. I would not choose a pipe, gravel, trench depth, or drain kit until I know what kind of water needs to be controlled.
Use the following decision guide as a starting point. It is not a substitute for site-specific design, but it helps prevent the common mistake of assuming every drainage problem needs a French drain.
Which Drainage System Fits the Problem?
Wet or saturated soil
Consider: French or other subsurface drainage after confirming a usable outlet and site conditions.
Water crossing a driveway or patio
Consider: Channel or trench drainage designed to intercept surface runoff.
Water collecting in one low spot
Consider: Catch basin connected to an appropriate conveyance system.
Roof or downspout runoff
Consider: A solid conveyance pipe or another approved roof-water drainage route rather than automatically using perforated pipe.
Water needs to infiltrate onsite
Consider: A properly designed dry well or infiltration solution if soil, groundwater, regulations, and site conditions allow it.
Broad sheet flow across a yard
Consider: Grading or a swale may sometimes address the cause more directly than installing underground pipe.
A French drain is generally associated with collecting and redirecting water in saturated soil, while channel or trench drains are intended to intercept surface flow in appropriate applications. Drainage manufacturers also separate products by application rather than treating every drain as interchangeable.
Main Types of Drain Construction
1. French Drains
A French drain is a subsurface drainage system typically built around a perforated or slotted drain pipe installed in a drainage trench. Depending on the system, aggregate and geotextile or another filtration method may be used around the pipe.
Its purpose is to intercept water in the soil and give that water a controlled path toward an appropriate destination.
A French drain may make sense when soil remains saturated, groundwater is moving through an area, or water consistently accumulates along a route where subsurface interception is appropriate. It should not automatically be your first choice for runoff moving rapidly across a paved surface.
2. Channel or Trench Drains
Channel drains use a linear channel and grate to intercept water at the surface. You commonly see this concept where runoff moves across driveways, patios, walkways, pool decks, garage approaches, and other hard surfaces.
Choosing a channel drain involves more than selecting its width. Flow demand, outlet size, grate type, installation method, traffic or load conditions, and the destination of the collected water can all matter.
3. Catch Basins and Yard Drains
A catch basin collects water at a concentrated low point and connects it to drainage piping. This can be useful where grading naturally directs runoff toward one location.
The basin must be positioned where water actually reaches it. A perfectly installed basin located several inches above the real low point will not solve the problem simply because a pipe is attached to it.
4. Dry Wells
A dry well is an infiltration solution rather than simply a pipe carrying water somewhere else. It temporarily receives water and allows it to infiltrate into surrounding soil where conditions permit.
This is why digging a random hole and filling it with stone is not automatically the same as designing a functioning dry well. Soil infiltration, groundwater conditions, expected water volume, available storage, setbacks, and local requirements can affect whether the concept is appropriate.
5. Swales and Grading
Not every drainage solution needs underground pipe. A swale is a shallow, shaped route that directs surface water by using the grade of the land.
When the main problem is sheet runoff traveling in the wrong direction, correcting the surface path can sometimes be simpler than trying to capture all that water underground.
6. Solid Drainage Pipe
Solid drainage pipe is useful when water has already been collected and needs to be conveyed without intentionally accepting groundwater along the route. Downspout drainage is one common example.
This distinction is important: perforated pipe collects water along its buried path; solid pipe primarily carries water that has already entered the system.
How to Build a Drain Step by Step
The exact construction procedure changes with the type of drain, but a reliable planning sequence usually looks like this.
- Identify where the water comes from. Determine whether you are dealing with rainfall runoff, groundwater, roof discharge, irrigation, a plumbing leak, or another source.
- Locate where the water collects. Look for low points, saturated areas, flow paths, stains, erosion, and the direction water travels during rain.
- Choose an appropriate drainage method. Match the system to the water problem rather than choosing a product first.
- Determine the destination. Decide where collected water can legally and safely discharge, infiltrate, or connect.
- Plan the route and elevations. Confirm that the required fall can be maintained from collection point to outlet.
- Check buried utilities and site restrictions. Do this before excavation, not after the trench is open.
- Excavate to the design dimensions. Depth and width should match the drainage system, pipe, basin, structural requirements, and site conditions.
- Prepare the base or trench. This may involve grading, aggregate, geotextile, bedding, or concrete depending on the system.
- Install the drainage components. Set pipe, basins, channels, fittings, inlets, outlets, or other parts to the appropriate elevations and manufacturer requirements.
- Complete filtration or backfill. A subsurface system may require aggregate and filtration measures; other systems have different backfill requirements.
- Finish the surface. Restore soil, sod, concrete, pavers, gravel, or landscaping while preserving the intended drainage route.
- Test before calling the job finished. Confirm that water enters the collection point, travels through the system, and reaches the intended destination without unexpected pooling or backup.
Do not start digging until you know the outlet
A trench can collect water perfectly and still fail as a drainage system if the water has nowhere appropriate to go. The outlet, infiltration point, or approved connection should be part of the design from the beginning.
Drain Construction Details That Determine Whether the System Works
Slope and Elevation
Gravity drainage needs a workable elevation difference between the collection area and its destination. You will often see a 1% slope used as a general reference in French-drain and exterior-drainage instructions, but it should not be treated as a universal specification for every pipe and every system.
For example, Home Depot’s French-drain guide calls for at least a 1% slope, while NDS notes that recommendations can vary with the drainage product and pipe type. The safest approach is to follow the project design and the installation requirements for the components you are actually using.
How Deep Should a Drain Be Buried?
There is no single correct burial depth for every drain.
A shallow yard drain, French drain, foundation drainage system, downspout pipe, and larger stormwater line may all require different depths.
As one example—not a universal specification—Home Depot’s DIY French-drain guide describes a trench about 18 inches deep and 9 to 12 inches wide. Your project may need different dimensions based on the purpose of the drain, outlet elevation, pipe size, soil, required cover, nearby structures, and product instructions.
Pipe Selection
Pipe selection should answer two questions:
- Do I need to collect water along the route?
- Or do I need to carry already-collected water from one point to another?
That distinction helps determine whether perforated or solid pipe is appropriate. Pipe material, stiffness, diameter, fitting system, expected loads, and manufacturer requirements also matter.
Which Way Should Perforated Pipe Holes Face?
You may see general advice online telling you that perforations must always face one particular direction. I would not apply that statement blindly.
Perforated and slotted drainage products are not all built the same way. Follow the installation orientation specified by the pipe or drainage-system manufacturer you have selected.
Gravel, Aggregate, and Filtration
In a traditional French-drain design, clean drainage aggregate creates open space through which water can move toward the pipe. A suitable geotextile or filtration method can help limit migration of fine soil into that drainage zone.
However, not every drainage product is a traditional pipe-and-gravel assembly. Some manufacturers sell prefabricated or gravel-free systems, which is another reason product-specific instructions matter.
Pipe Size and Drainage Area
A pipe should not be chosen only because it is common at a hardware store. The system needs enough capacity for the water it is expected to receive.
For stormwater systems, drainage area, runoff, available fall, inlet capacity, pipe characteristics, and the outlet can all influence design. NDS technical guidance similarly treats drainage area and available fall as relevant inputs when evaluating exterior drainage.
The Outlet
The outlet deserves as much attention as the trench itself.
Depending on the project and local rules, a drainage system may lead toward an approved stormwater connection, another permitted discharge route, or an onsite infiltration solution. You should not assume you can direct collected water into a neighboring property, roadway, canal, storm system, or other location without checking what is allowed.
Maintenance Access
A system that cannot be inspected or cleaned can become difficult to maintain. Depending on the design, accessible grates, basins, cleanouts, outlets, or other service points can make future maintenance much easier.
A Visual Example: French Drain Installation
If you understand the concept better by seeing the construction sequence, this video provides a visual walkthrough of a common French-drain installation. Use it as an example rather than a site-specific design: your pipe, depth, slope, soil, outlet, and local requirements may differ.
Common Drain Construction Mistakes
A drainage project can look finished above ground and still perform poorly. These are the mistakes I would watch for before focusing on appearance.
Choosing the Wrong Type of Drain
A French drain will not necessarily be the best way to intercept fast-moving driveway runoff, and a small surface basin may not solve widespread groundwater saturation. Diagnose the water before choosing the hardware.
Building Without a Real Outlet
Collecting water is only half the job. If the system terminates at a point that cannot accept or release the water, the trench can remain saturated or back up.
Losing the Required Grade
A route may look downhill overall while still containing a low section or reverse slope. Checking elevations through the full run is more reliable than judging by eye.
Undersizing the System
A small pipe or inlet can become the restriction in an otherwise well-built system. Collection area and expected flow should influence sizing.
Ignoring Sediment
Soil, leaves, mulch, sand, and other debris can enter drainage systems. Appropriate filtration, inlet design, and maintenance access help manage that risk.
Mixing Roof Water and Groundwater Without a Plan
Water from a downspout arrives differently from groundwater entering a French drain. In some drainage designs, separate solid and perforated lines may be used because they perform different jobs. Combining flows should be a design decision, not an automatic shortcut.
Following a Universal Internet Measurement
“Dig exactly this deep,” “use this pipe everywhere,” or “place every perforation this way” can sound convenient, but drainage construction is site-dependent. Use specifications that match the system you are installing.
Can I Install My Own Drain?
Yes, some homeowners can handle a straightforward drainage project, especially when the water source, route, outlet, and excavation are simple and well understood.
The more difficult question is whether your particular project is suitable for DIY construction.
DIY may be more reasonable when:
- The water source is obvious.
- The route is accessible.
- You have a clear, appropriate outlet.
- The excavation is limited and away from sensitive structures.
- No complicated utility conflicts are present.
- You can establish and verify the required grade.
- The selected product has clear installation instructions.
Professional evaluation becomes more important when:
- Water is affecting a foundation or building.
- You do not know where the water originates.
- There is no obvious legal or workable outlet.
- The project requires significant excavation.
- Groundwater enters the excavation.
- The work may involve regulated stormwater infrastructure.
- Several drainage systems need to interact.
- The problem may actually be a broken or clogged plumbing line.
How Much Does It Cost to Build a Drain?
There is no responsible single price for “drain construction” because that phrase can describe anything from a short surface-drainage improvement to extensive excavation and underground drainage work.
Instead of relying on a generic number, look at the factors that actually create the cost:
- Type of drainage system
- Total drainage length
- Trench depth and width
- Pipe size and material
- Number of catch basins, inlets, fittings, or channels
- Amount and type of aggregate
- Geotextile or filtration materials
- Soil and excavation difficulty
- Groundwater or dewatering requirements
- Access for equipment
- Concrete, asphalt, paver, or landscape removal
- Disposal of excavated material
- Outlet construction
- Permits or engineered design when required
- Restoration after the drainage work is finished
What is the cheapest drainage method?
The cheapest system is the least expensive solution that actually corrects the cause. If surface grading can redirect runoff, installing a long underground French drain may be unnecessary. If the soil is saturated from subsurface water, however, a shallow surface adjustment may not solve it. Diagnose first and compare solutions second.
Can I Dig a Hole and Fill It With Gravel for Drainage?
You can dig a gravel-filled hole, but that does not mean you have created an effective drainage system.
For the hole to function as an infiltration feature, water must have somewhere to go after entering it. If the surrounding soil cannot absorb water fast enough, the groundwater is already high, or the storage volume is inadequate, the hole may simply become another place for water to collect.
A properly selected dry well or infiltration system considers how water enters, how much storage is available, how quickly the surrounding soil can accept water, groundwater conditions, maintenance, and local requirements.
How Far Should a Drainage Pipe Be From a House?
There is no universal distance that applies to every drainage pipe.
The correct location depends on what the system is designed to do. A foundation drainage system may intentionally be associated with the foundation area, while a yard-drainage pipe carrying collected runoff may follow an entirely different route.
The more useful questions are:
- What water am I trying to intercept?
- Could excavation affect the foundation or another structure?
- Where does the existing grade direct water?
- Can the pipe maintain the required elevation to its outlet?
- Will the discharge point move water away without causing another problem?
If excavation will be close to a foundation, footing, retaining wall, buried utility, or other structural element, do not select the trench location from a generic online distance alone.
What Are the Four Types of Drainage?
You may see different answers because there is no single four-part classification used for every plumbing, civil, landscape, and construction context.
For a homeowner, one practical way to separate drainage is:
- Sanitary drainage: household wastewater from plumbing fixtures.
- Surface or stormwater drainage: rain and runoff moving across roofs, yards, driveways, and other surfaces.
- Subsurface or foundation drainage: unwanted water within soil or around below-grade areas.
- Onsite wastewater drainage: systems associated with treating and dispersing sanitary wastewater onsite.
For a drain-construction project involving rain or groundwater, the key distinction is usually surface water versus subsurface water.
Drain Construction vs. Drain Cleaning: Which Problem Do You Have?
This is an important distinction because “drain problem” can mean two completely different things.
You may need drainage construction when:
- Rainwater pools in a yard.
- A driveway sends runoff toward a building.
- Soil remains saturated.
- You need a new catch basin or exterior drainage path.
- There is no existing system where water needs to be controlled.
You may need drain service instead when:
- A sink, shower, tub, or floor drain is slow.
- Existing plumbing drains are backing up.
- Several fixtures are draining poorly.
- Water is not moving through an existing sanitary drain.
- The issue appears to be an obstruction rather than missing drainage infrastructure.
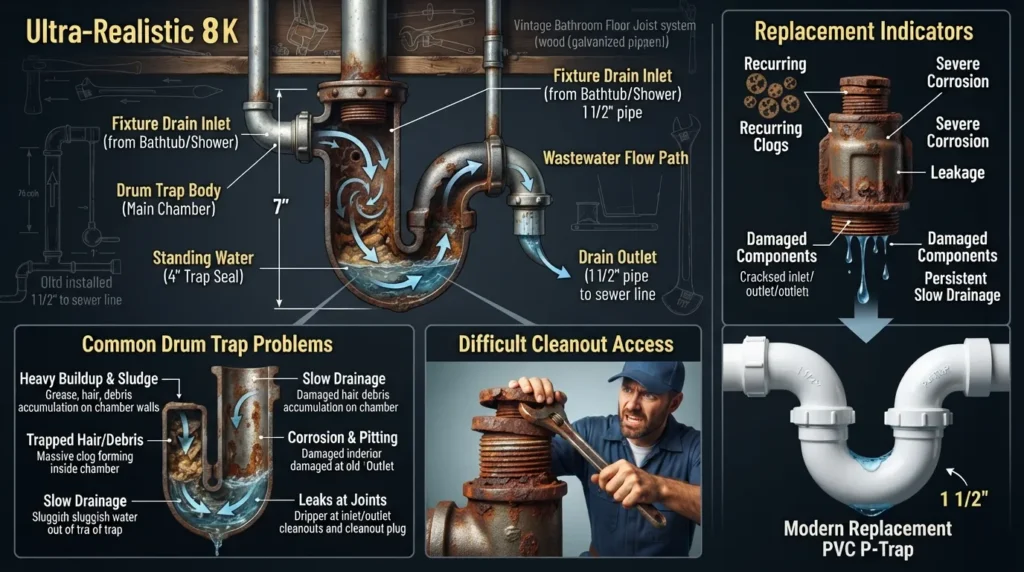
If the problem is an obstruction in an existing plumbing line rather than exterior water management, learn more about professional drain cleaning.
Drain Construction Considerations in Miami
Drainage design becomes especially site-specific when local stormwater, groundwater, and discharge conditions affect how quickly a property can get rid of water.
Miami-Dade County explains that stormwater may infiltrate porous ground or collect on impervious surfaces such as streets, parking areas, and rooftops. The County’s stormwater program is intended to address drainage capability, flood protection, and the environmental effects of runoff.
1. Think About Groundwater as Well as Surface Water
A drainage design that depends entirely on water soaking quickly into the ground may behave differently when surrounding soils are already saturated. Miami-Dade planning and resilience materials note that higher groundwater levels can reduce drainage capacity, and groundwater can rise significantly during storm events in some conditions.
2. Do Not Assume Every Discharge Route Is Allowed
Miami-Dade lists different environmental and construction reviews for activities such as drainage outfalls, work involving county canal rights-of-way, dewatering, and drainage systems at contaminated sites. The requirements depend on the project, so verify the applicable county and municipal rules before making a regulated connection or discharge.
3. Plan Before Excavating Into Groundwater
If excavation encounters groundwater and water has to be pumped from the excavation, additional requirements can apply. Miami-Dade identifies a Class V environmental permit for certain temporary dewatering activities.
Miami project reminder
Do not assume a drainage design that works in another state or another neighborhood can be copied exactly onto your property. Water source, elevations, soil conditions, groundwater, outlet options, existing utilities, and permitting can change the solution.
How to Test a New Drainage System
Do not judge a drain only by how clean the finished trench looks.
Before considering the system complete, check the entire water path:
- Does water reach the inlet or drainage zone?
- Does it enter the system instead of bypassing it?
- Does the pipe or channel maintain flow through the full route?
- Are there unexpected low points?
- Does water reach the intended outlet?
- Can the outlet accept the water without backing up?
- Does discharge create erosion or unwanted pooling?
- Are grates, basins, or access points still reachable for maintenance?
A drainage system succeeds when the complete path works—not merely when each component was installed.
How to Maintain a Constructed Drain
Even a well-designed drainage system needs occasional inspection.
- Remove leaves, mulch, and debris from surface grates.
- Inspect catch basins and accessible inlets.
- Check whether water is still reaching the system after landscaping changes.
- Watch for new standing water along the pipe route.
- Keep the outlet visible and unobstructed where appropriate.
- Look for erosion around discharge areas.
- Investigate a noticeable reduction in drainage performance instead of simply adding another drain.
If an existing drainage or plumbing line stops carrying water as it should, first determine whether the cause is clogging, damage, loss of slope, a failed outlet, or an original design problem. The repair depends on the cause.
Frequently Asked Questions About Drain Construction
The Most Important Rule: Diagnose Before You Dig
Good drain construction is not about installing the largest pipe or digging the deepest trench. It is about creating a complete water path that matches the actual problem.
Before you start, answer five questions:
- Where is the water coming from?
- Is it surface water or subsurface water?
- Where does it need to be collected?
- Where can it safely and legally go?
- Which drainage system connects those two points most effectively?
Once those answers are clear, decisions about trench depth, pipe, gravel, catch basins, channels, slope, filtration, and maintenance become much easier to make.
Not Sure Whether You Need a New Drain or Service on an Existing One?
If water is pooling around your property or an existing plumbing drain is no longer working correctly, identifying the cause first can prevent unnecessary work. Our Miami plumbing team can help you determine whether the issue points to an existing plumbing drain, a repair need, or a broader drainage concern.
Helpful Drain Construction References
For product-specific installation requirements and local regulatory questions, use primary manufacturer and government information rather than relying on a universal drainage rule.