If your sink is draining slowly, leaking under the cabinet, or you’re starting a new install from scratch, understanding how drain sink plumbing actually works will save you time, money, and a wet cabinet floor. Whether you’re dealing with a kitchen sink drain pipe or a bathroom sink drain pipe, the core parts and principles are similar — but the details that trip people up are usually the same handful of mistakes.
In this guide, we’ll walk through every part of the system, the exact assembly steps, the code rules people get wrong (like why an S-trap is illegal), and — just as importantly — how to tell when a project has moved past “quick DIY fix” into “call a plumber” territory.
Plumbing a sink drain means connecting the sink’s drain basket to the home’s main drain line using a tailpiece, a P-trap (to block sewer gas), and a trap arm that ties into the wall or floor drain — all sealed with slip-joint nuts and properly vented so the water drains freely without siphoning.
What Sink Drain Plumbing Actually Involves
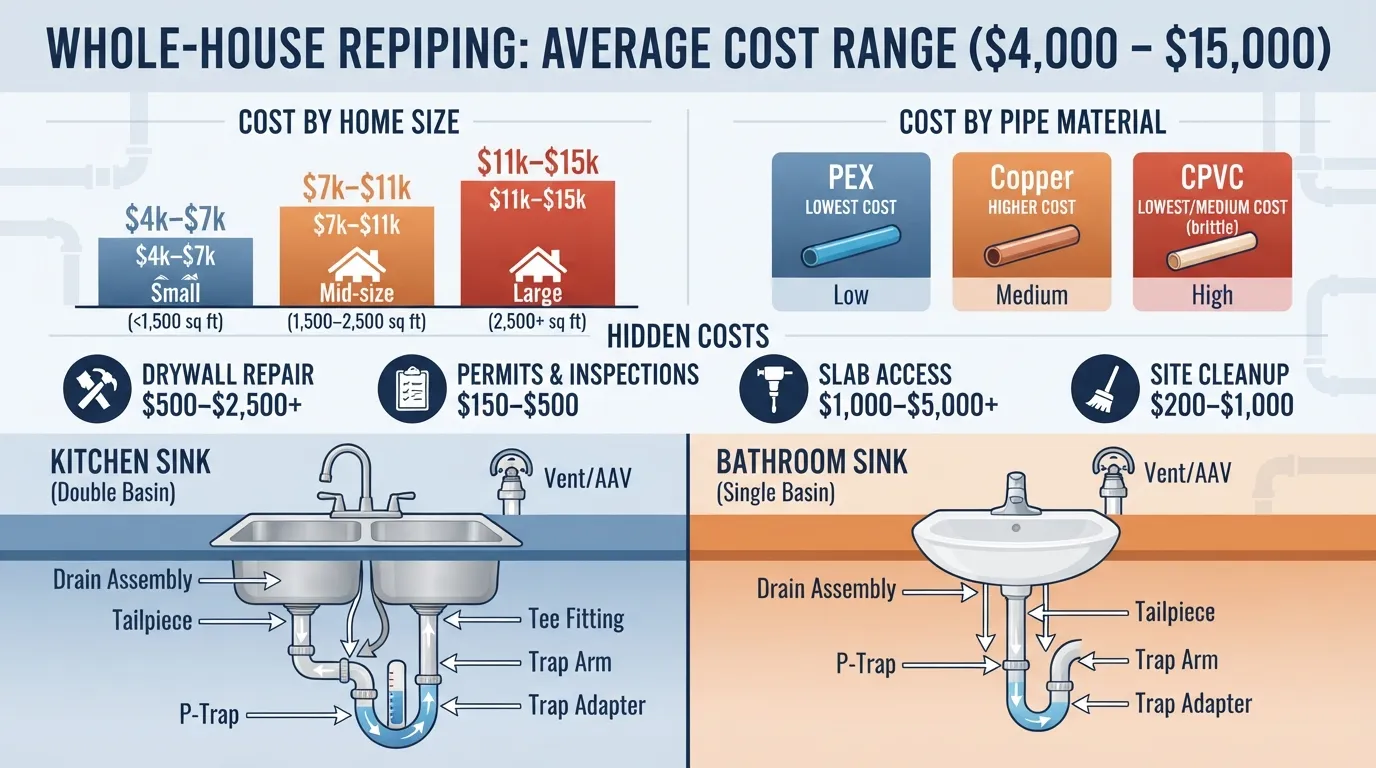
Every sink — kitchen or bathroom — relies on the same basic chain of parts to move water safely out of your home while keeping sewer gas from coming back in. Here’s what each piece does:
| Component | What It Does |
|---|---|
| Drain Assembly | The visible drain fitting inside the sink basin, sealed underneath with plumber’s putty or silicone. |
| Tailpiece | The vertical pipe that drops down from the drain basket. |
| P-Trap | The U-shaped pipe that holds standing water to block sewer odors from entering the home. |
| Trap Arm | The horizontal pipe connecting the P-trap to the drain line inside the wall. |
| Tailpiece Extension / Tee | Used to join two sink basins (like a double kitchen sink) into one shared drain line. |
| Vent / Air Admittance Valve (AAV) | Lets air into the system so water drains smoothly instead of gurgling or siphoning the trap dry. |
Kitchen Sink Drain Plumbing vs. Bathroom Sink Drain Plumbing
The core parts are the same, but the setup isn’t identical. Here’s where kitchen and bathroom sink drain plumbing actually differ:
| Factor | Kitchen Sink | Bathroom Sink |
|---|---|---|
| Number of basins | Often double — needs a tee fitting to join both sides | Usually single basin |
| Common add-ons | Garbage disposal, dishwasher drain line | Pop-up stopper assembly |
| What clogs it most | Grease, food particles | Hair, soap scum, toothpaste buildup |
| Typical pipe diameter | 1½” tailpiece and trap | 1¼” tailpiece and trap |
How to Plumb a Sink Drain: Step-by-Step
- Install the drain body. Run a bead of 100% silicone or plumber’s putty around the underside of the sink flange, drop it into the drain hole, then secure it from below with the rubber washer and lock nut.
- Connect the tailpiece. Attach it to the bottom of the drain assembly. For a double-basin kitchen sink, connect both tailpieces into a center or end outlet tee.
- Assemble the P-trap. Slide a slip-joint nut and beveled plastic washer onto the tailpiece — beveled side facing down toward the nut — then connect the P-trap.
- Attach it to the wall. Slide a trap adapter onto the wall stub-out, fit the trap arm into the adapter and the P-trap, and tighten the slip-joint nuts securely with adjustable pliers.
- Confirm the vent. Your system needs either a vertical vent stack or an air admittance valve (AAV) so pressure equalizes and the trap doesn’t get siphoned dry.
- Test for leaks. Fill the basin, pull the plug, and let it drain fast while checking under the cabinet with a flashlight for drips at the slip joints.
Key Takeaways
- Beveled washers always face down, toward the nut.
- A P-trap is required by code — an S-trap is not.
- Every drain needs a working vent or AAV to drain properly.
- Double kitchen sinks need a tee fitting to merge both drains.
Why an S-Trap Is Illegal (And What to Use Instead)
Code Warning: An S-trap is banned under most modern plumbing codes because its shape lets the drain “self-siphon” — the water seal gets pulled out of the trap as it drains, leaving nothing to block sewer gas. Always transition into a proper P-trap with a vented trap arm instead.
Common Questions About Sink Drain Plumbing
What is the “1-3-5 rule” in plumbing?
It’s a rough sizing guideline plumbers use for trap arm length relative to pipe diameter — generally, the trap arm shouldn’t run so far horizontally that it loses proper slope before reaching the vent. In practice, it’s a reminder that trap-to-vent distance and pipe diameter are directly connected, and getting this wrong is a common reason drains gurgle or drain slowly.
What are the parts of a sink drain called?
The main parts are the drain assembly (or drain body), tailpiece, P-trap, trap arm, and — where needed — a tailpiece extension or tee and a vent/AAV. Each one is covered in detail in the table above.
How far below the sink should the drain pipe sit?
There’s no single fixed number — it depends on your specific fixture height and trap configuration. The safest approach is to dry-fit the tailpiece and trap before gluing or tightening anything, adjusting the height so the P-trap sits level and the trap arm keeps a slight downward slope toward the wall.
Can a sink drain have a 90-degree elbow?
Sharp 90-degree turns right after the trap are generally avoided because they slow drainage and make clogs more likely. Gentle sweeps or two 45-degree fittings are the better practice when you need to change direction.
Plumber’s putty or silicone on a sink drain?
Plumber’s putty works well for most metal and porcelain sinks. For granite, composite, or cultured marble sinks, 100% silicone sealant is usually the safer choice since some putties can stain or react with those materials.
Should the drain be in the middle or to the side?
Centered drains are the standard for single-basin sinks and make trap alignment simpler. Off-center or side drains show up mostly on specialty or farmhouse sinks, and usually require extra fittings to route the tailpiece back to the wall stub-out.
Can you plumb in a sink yourself?
Straightforward swaps — like replacing a P-trap or reconnecting a tailpiece — are within reach for a confident DIYer with basic tools. Anything involving new drain lines, wall penetrations, or venting changes should go through a licensed plumber, since those touch your home’s plumbing code compliance.
DIY or Call a Plumber? Here’s How to Decide
✅ Safe to DIY
- Swapping an old P-trap for a new one
- Re-sealing a leaking drain flange
- Replacing worn slip-joint washers
- Reconnecting a tailpiece that’s come loose
🚫 Call a Licensed Plumber
- You find an S-trap and need it corrected to code
- The drain line inside the wall needs to be rerouted
- You’re adding a vent or AAV where none exists
- Water keeps backing up even after clearing the trap
- You smell sewer gas even with the trap full of water
If your project falls into that second list, it’s worth having it looked at rather than guessing. Our team at Miami Florida Plumbing handles sink drain repairs and installs regularly, and can also help with related work like water heater replacement if you’re tackling more than one fixture at a time. You can see the full range of what we cover on our plumbing services page.
Watch: Sink Drain Plumbing in Action
If you’d rather see the assembly process than read it, these two walkthroughs cover bathroom and kitchen sink drains step by step:
Final Thoughts
Sink drain plumbing isn’t complicated once you understand what each part is doing — but small mistakes like an unvented trap, an illegal S-trap, or a washer installed backward are exactly what cause leaks and slow drains down the road. Take it slow, dry-fit before you tighten anything, and test thoroughly before you call it done.
Not in the mood to fight with slip-joint nuts under your sink?
Our licensed plumbers handle sink drain installs and repairs across Miami — fast, clean, and done right the first time.