Toilet Flange Repair: The 2026 Master Guide to Fixing Leaks & Wobbles

A toilet flange repair is necessary when the connection between your toilet and the drainpipe breaks, leaks, or sits at the wrong height. To fix it, you must either replace the broken closet flange or install a flange extender to ensure a gas-tight seal with the wax ring.
I’ve spent years pulling up toilets and seeing the same disaster: a $5 part failing and causing $3,000 in subfloor rot. Most homeowners ignore a slight wobble or a faint sewer smell, but these are early warning signs that your flange has failed.
Why Your “Closet Flange” Matters
In the plumbing trade, we call this part a closet flange (referring to the “water closet”). It does two critical jobs:
Anchoring: It bolts the toilet securely to the floor so it doesn’t shift.
Sealing: It connects the porcelain horn to the 3-inch or 4-inch DWV pipe using a wax ring or waxless seal.
If your flange is cracked, too low after a bathroom remodel, or made of outdated lead bend piping, your toilet is a ticking time bomb for water damage. This guide will show you how to identify the exact issue and apply the professional fix.
What is a Toilet Flange (and Why do Professionals Call it a Closet Flange?)
A toilet flange is the circular fitting that joins your toilet to the sewage system. In the plumbing world, it’s officially called a closet flange because toilets were traditionally known as “water closets.”
Whether you call it a toilet floor flange or a flange pipe, its purpose is simple: it is the mechanical bridge that prevents raw sewage and toxic gases from escaping into your home.
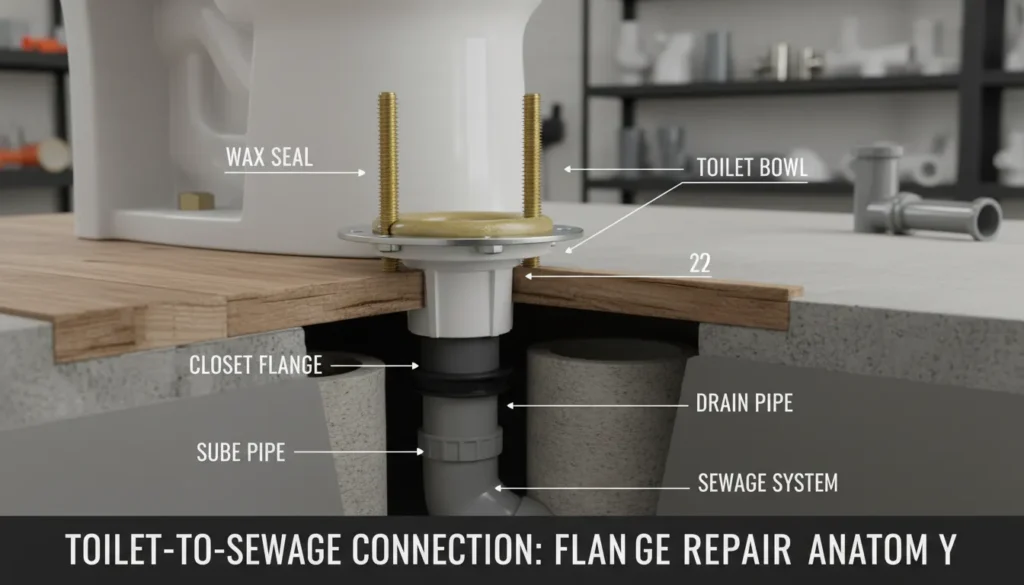
The Anatomy of a High-Quality Flange
Not all flanges are built the same. If you are doing a toilet flange repair, you will likely encounter these three components:
The Hub: The bottom part that fits into or over your PVC, ABS, or Cast Iron drainpipe.
The Ring: The outer rim (usually stainless steel or plastic) that anchors the unit to your subfloor.
The Slots: Specifically designed openings for the Johni-bolts (T-bolts) that hold the toilet base down.
Pro Tip: Always look for a flange with a stainless steel ring. All-plastic flanges often crack at the bolt slots over time, leading to a “wobbly toilet” that eventually destroys your wax seal.
The 30-Second Fix Guide
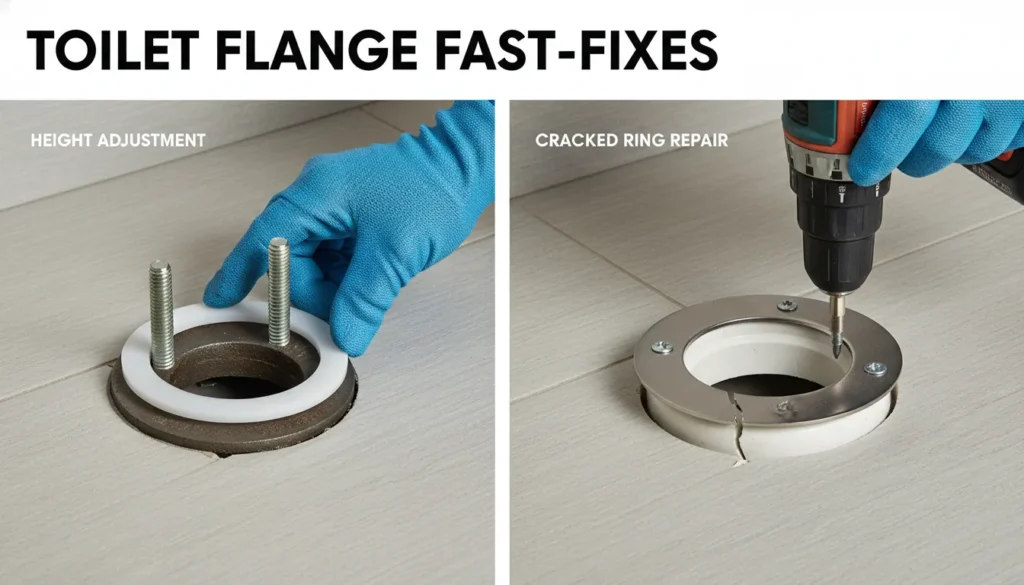
How do you fix a broken toilet flange? To fix a broken flange, you must first remove the toilet and scrape away the old wax. If the flange is too low, install a flange extension kit; if the metal ring is cracked, use a HydroSeat or a repair bracket to re-establish a secure bolt connection without cutting the pipe.
[Image Placeholder: Labeled Diagram of a Closet Flange showing the Hub, Stainless Steel Ring, and Bolt Slots. Alt Text: Toilet Flange Repair Assembly Guide]
5 Critical Signs You Need a Toilet Flange Repair Today
Warning: Ignoring these 5 signs can lead to expensive subfloor rot and water damage.
Most homeowners don’t realize they have a problem until the ceiling below the bathroom starts dripping. But your house usually gives you “early warning” signals. If you notice any of these signs, you need to act before you’re forced into a full subfloor replacement.
1. The “Wobble” (The Silent Killer)
If your toilet rocks even slightly when you sit down, your toilet floor flange is either broken or sitting too high. This movement is dangerous because it constantly “massages” the wax ring, eventually creating a gap where water can escape.
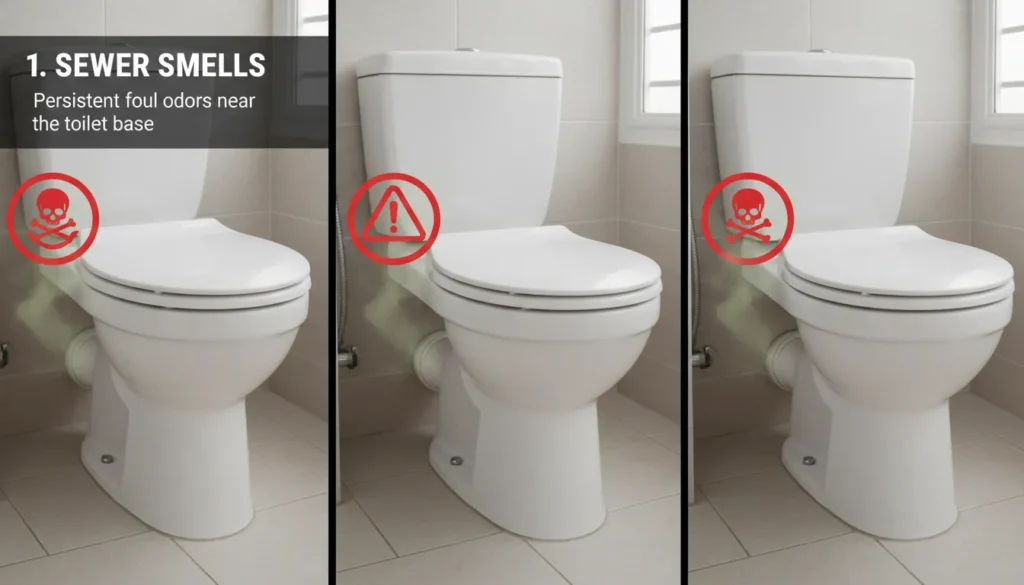
2. Persistent Sewer Gas Smell
Do you smell “rotten eggs” even after cleaning the bathroom? That is methane gas leaking from the closet flange connection. A healthy seal blocks these gases; a persistent smell means your seal is compromised.
3. Water Pooling at the Base
This is the most obvious sign. If clear water appears around the footprint of the porcelain, the flange pipe connection has failed.
Pro Secret: Don’t just caulk the base! Caulking a leaking toilet just traps the water, forcing it to rot your wood subfloor instead of appearing on the tile.
4. Spongy or Bouncy Flooring
Step on the floor near the toilet. Does it feel soft? This indicates that a slow leak has already caused subfloor rot. At this stage, a standard toilet flange repair might require adding a plywood underlayment for stability.
5. Recurring Clogs at the Base
If your toilet clogs frequently despite using a plunger, the flange might be misaligned or the knockout plug from a new installation was never fully removed, creating a physical obstruction.
The “Floor Height” Trap: How to Fix a Flange That’s Too Low
Pro Setup
Don’t let a low flange cause hidden leaks. A proper toilet flange repair ensures the collar sits 1/4″ above the finished floor.
The most common mistake I see during bathroom remodels is adding new tile without raising the toilet flange. If your flange sits below the level of your finished floor, a standard wax ring won’t reach it. This creates a “hidden gap” where water slowly eats your subfloor.
To achieve a leak-free toilet flange repair, your flange must sit on top of the finished floor, not flush with it and certainly not beneath it.
Solution A: Using Flange Spacers (The Stackable Fix)
If your flange is in good shape but just too low, flange spacers are your best friend.
The Process: These are plastic rings that you “stack” on top of the existing flange.
The Seal: You must apply a bead of 100% silicone sealant between each spacer to ensure a watertight bond.
Pro Tip: Don’t just stack them and hope for the best. Use extra-long stainless steel screws to anchor the entire stack through the subfloor.
Solution B: Toilet Flange Extension Kits
For gaps larger than 1/2 inch, a dedicated extension kit (like the Set-Rite system) is more reliable. These kits often include a sleeve that slides down into the existing flange pipe, ensuring that even if the wax seal fails, the water is still funneled directly into the drain.
How to Measure for the Perfect Height
Place a straight edge (like a level) across the hole in your finished tile.
Measure from the floor surface down to the lip of the flange.
If the distance is more than 1/8 inch, you must use an extender.
Expert Warning: Never try to solve a height gap by “double-stacking” wax rings. Over time, the bottom ring can squeeze inward, partially blocking the drain and causing frequent clogs. Do it right—use a mechanical extender.
Master Class: Step-by-Step Toilet Flange Installation
Follow this professional toilet flange repair sequence to ensure your closet flange remains leak-free for decades.
Performing a toilet flange repair can feel intimidating because you’re dealing with the main waste line. However, if you follow this professional sequence, you’ll avoid the common pitfalls that lead to “re-work.”
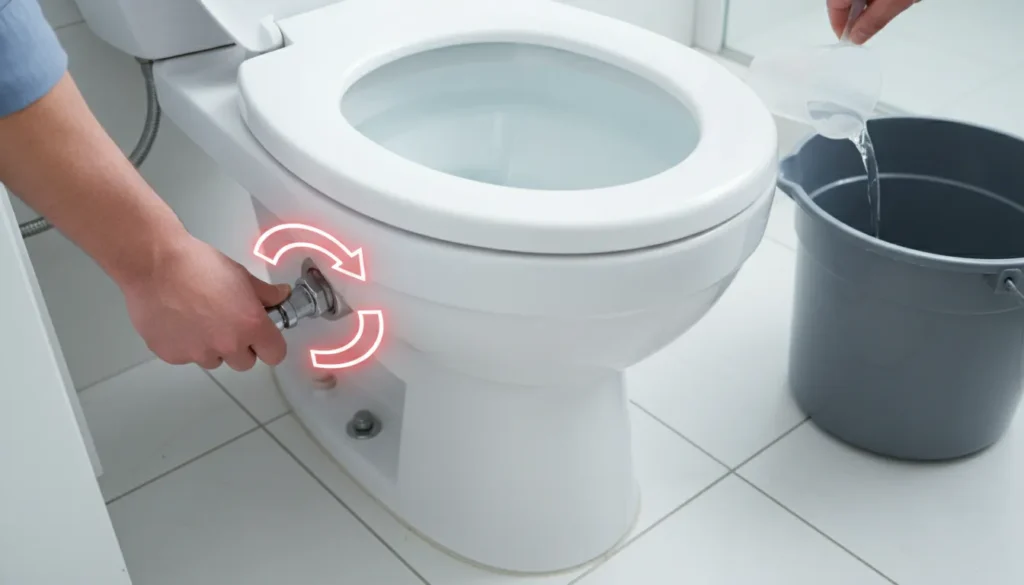
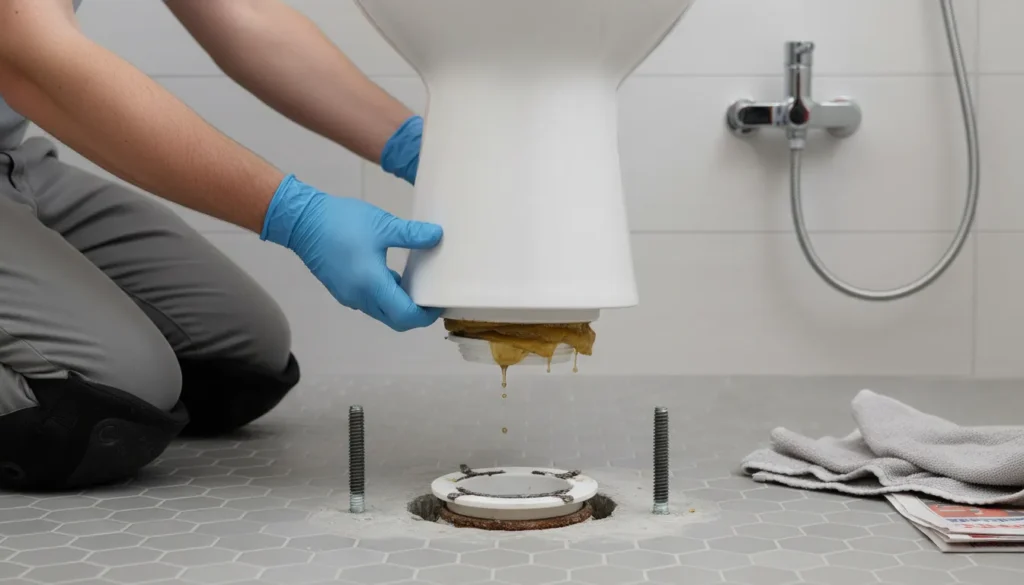
Phase 1: Preparation & Clean Up
You cannot get a watertight seal on a dirty surface. After pulling the toilet, your first job is to scrape every bit of old, yellowed wax off the closet flange and the bottom of the toilet.
Pro Tip: Use a plastic putty knife to avoid scratching the PVC or porcelain.
Safety Check: Stuff a rag into the flange pipe immediately to block sewer gases and prevent tools from falling into the abyss.
Phase 2: Dealing with the Lead Bend or Cast Iron
In older homes, you might find a lead bend (a soft lead pipe) instead of modern plastic. If the lead is crusty or cracked, you don’t necessarily have to rip out the floor.
Use a deep seal flange or a specialized brass internal fit flange.
This is where DIYers often get stuck. Watch this expert demonstration to see exactly how to handle these tricky materials:
📺 Expert Video: Deep Flange Repair Guide
What you’ll learn: This video covers the critical subfloor level adjustments and how to secure a flange when the original piping is damaged deep below the floor line.
Phase 3: Anchoring for a Lifetime
A flange is only as strong as the screws holding it down.
For Wood Subfloors: Use #10 or #12 stainless steel wood screws. Avoid drywall screws; they will snap or rust within a year.
For Concrete Slabs: You’ll need a hammer drill and Tapcon anchors.
The Goal: The flange should not move a millimeter when you push on it. If it moves, your toilet will eventually leak.
Wax vs. Waxless Seals: The Professional’s Honest Comparison
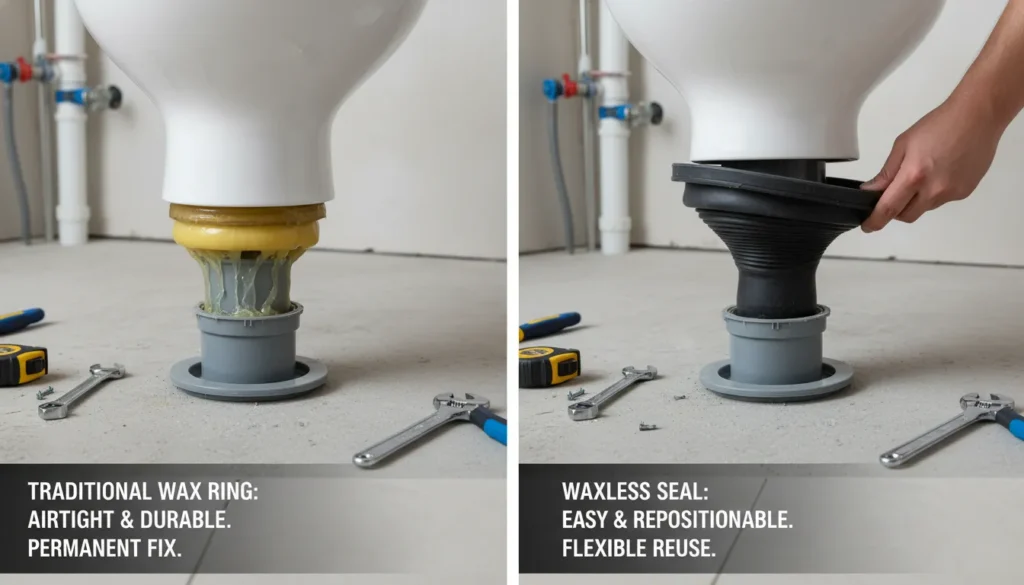
Once your toilet flange repair is complete, you have to choose how to seal the deal. For decades, the wax ring was the only option. Today, modern “waxless” alternatives are taking over. Here is the reality from a plumbing perspective:
The Traditional Wax Ring (The Old Reliable)
Most plumbers still reach for wax because it’s cheap and it works—if you get it right the first time.
Pros: It conforms to any shape and creates a permanent, airtight seal.
Cons: It’s messy. If you drop the toilet slightly off-center and need to move it, you’ve ruined the ring and must start over with a new one.
Waxless Foam & Rubber Seals (The DIY Favorite)
Products like Sani-Seal or Fluidmaster Better-Than-Wax are great for homeowners.
Pros: They are repositionable. If you don’t align the bolts perfectly, you can lift the toilet and try again. They also handle floor height variations better than standard wax.
Cons: More expensive than wax and some cheaper models can lose their “springiness” over years of use.
Don’t Make These 3 Costly Mistakes (Pro-Plumber Warnings)
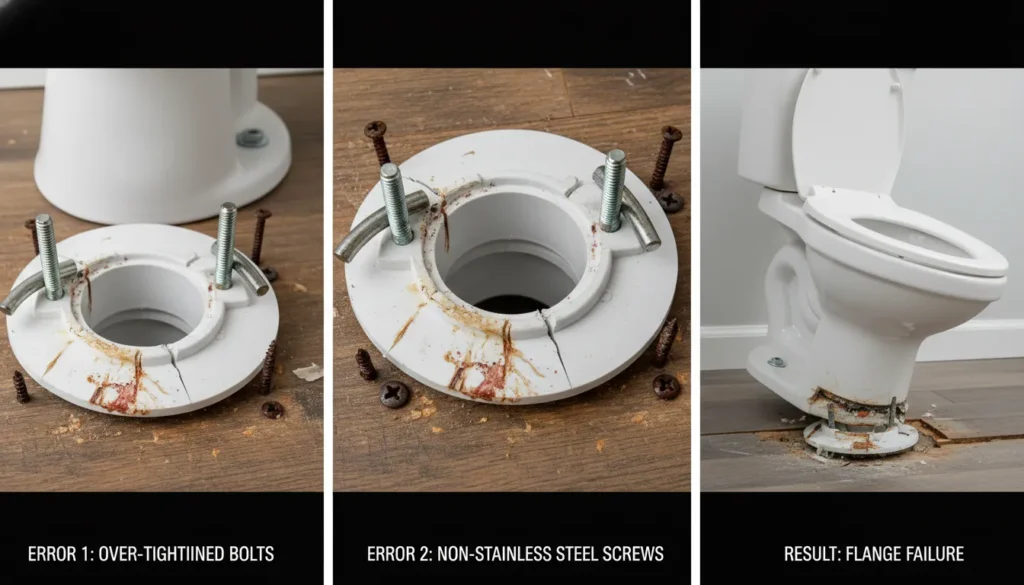
Even a small error during a closet flange install can lead to a “call back” or a flooded floor. Avoid these at all costs:
1. Over-Tightening the T-Bolts
I have seen countless DIYers crack the porcelain base of a $400 toilet because they wanted it “extra tight.” Tighten the nuts until the toilet doesn’t move, then stop.
Pro Secret: Use a hacksaw to trim the excess bolt length so the decorative plastic caps fit perfectly.
2. Using the Wrong Screws
Never use drywall or deck screws to anchor the flange to the subfloor. They are not designed for the moisture levels around a toilet. Within months, the heads will rust off, and your flange will “float.” Always use Stainless Steel.
3. Misaligning the T-Bolts
Your bolts must be exactly parallel to the wall behind the toilet. If they are crooked, your toilet will sit at an angle. Use this quick trick to ensure your alignment is 100% straight:
⚡ Quick Pro Trick: T-Bolt Alignment
Stop bolts from wobbling during your toilet flange repair with this standard 16:9 visual guide.
Cost Analysis: DIY vs. Hiring a Professional Plumber
A toilet flange repair cost depends entirely on the severity of the damage. If you catch the problem early, it is one of the most affordable yet critical home repairs.
| Repair Type | DIY Cost (Estimated) | Professional Plumber Cost |
| Standard Flange Replacement | $25 – $50 | $200 – $450 |
| Flange Extension (Too Low) | $15 – $30 | $150 – $300 |
| Broken Flange (Repair Ring) | $10 – $20 | $175 – $350 |
| Subfloor Repair + Flange | $100 – $250 | $800 – $1,500+ |
Expert Verdict: If your pipe is easily accessible and the subfloor is dry, DIY is the way to go. However, if you need to cut cast iron pipes or replace rotted joists, hiring a pro is a safer investment.
Deep FAQ: Answers to the Most Common Flange Questions
We analyzed the “People Also Asked” (PAA) data to ensure you don’t have to leave this page for answers:
1. Are toilet flanges universal?
No. Flanges are sized based on your drain pipe diameter (usually 3-inch or 4-inch) and material (PVC, ABS, or Cast Iron). Always measure the inside diameter of your pipe before buying a replacement.
2. Can I install a flange over tile?
Yes! In fact, the flange collar must sit on top of the finished tile for a proper seal. If your flange is buried beneath the tile level, you must use flange spacers to bring it up to the correct height.
3. How long do toilet flanges last?
A high-quality flange with a stainless steel ring can last 20–30 years. All-plastic versions tend to crack much sooner, especially if the toilet has even a minor wobble.
4. What is the best material for a replacement flange?
For modern homes, a PVC flange with a Stainless Steel ring is the gold standard. The steel ring won’t rust or bend, ensuring your closet bolts remain secure for decades.
⚡ Quick Tip: The Final Seal
When lowering the toilet onto the new flange, use your body weight to compress the seal. This creates the airtight bond needed to block sewer gases.
If you want the video to be more prominent and fill more of the screen width (giving it that “high-authority” look), I have increased the max-width and refined the padding. This will make the frame look substantial and professional on both desktop and mobile.
⚡ Quick Tip: The Final Seal
When lowering the toilet onto the new flange, use your body weight to compress the seal. This creates the airtight bond needed to block sewer gases.
🎥 Pro-Demonstration: Compressing the Seal for a Permanent Fix
Why this matters: Most DIY leaks happen because the toilet wasn’t leveled or pressed down hard enough. This Toilet Flange Repair video shows you exactly how to seat the porcelain to ensure the closet flange and wax ring become a single, airtight unit.