Professional Toilet Repair Service in Miami: Fast & Affordable
Best Toilet Repair Miami: Residential Solutions & Cost-Effective Fixes
Don’t let a leaking tank or a stubborn clog flush your money away. Whether you need a universal repair kit installation or a brand-new toilet for your home, our licensed plumbers at EZ Plumbing provide fast, reliable, and mess-free solutions. Claim your $10 discount and get your plumbing back on track today!
🛡️ Why We Are the #1 Choice for Toilet Repair & Installation
In the plumbing industry, expertise and reliability are everything. We don’t just fix toilets; we provide long-term peace of mind. Here is why homeowners and businesses trust us
⚡ Same-Day Emergency Service
A toilet malfunction is a major household disruption. Our rapid-response team is dispatched immediately, ensuring an expert is at your doorstep within 2 hours to resolve the issue.
🛠️ Universal Kit Installation
We specialize in installing industry-leading components from brands like Fluidmaster and Korky. Whether you have a standard or high-efficiency model, our universal repair kits ensure a perfect, leak-free fit every time.
👨🔧 Licensed & Insured Professionals
Your property is a major investment. Our technicians are fully certified, insured, and background-checked. We strictly adhere to all Local Plumbing Codes and safety standards to ensure a flawless installation.
💰 $50 Instant New Customer Discount
Premium service shouldn’t break the bank. We are currently offering an exclusive $10 discount for all new clients to ensure you get the highest quality repair at the most competitive price.
Quick Fix: How to Repair a Running Toilet in Minutes
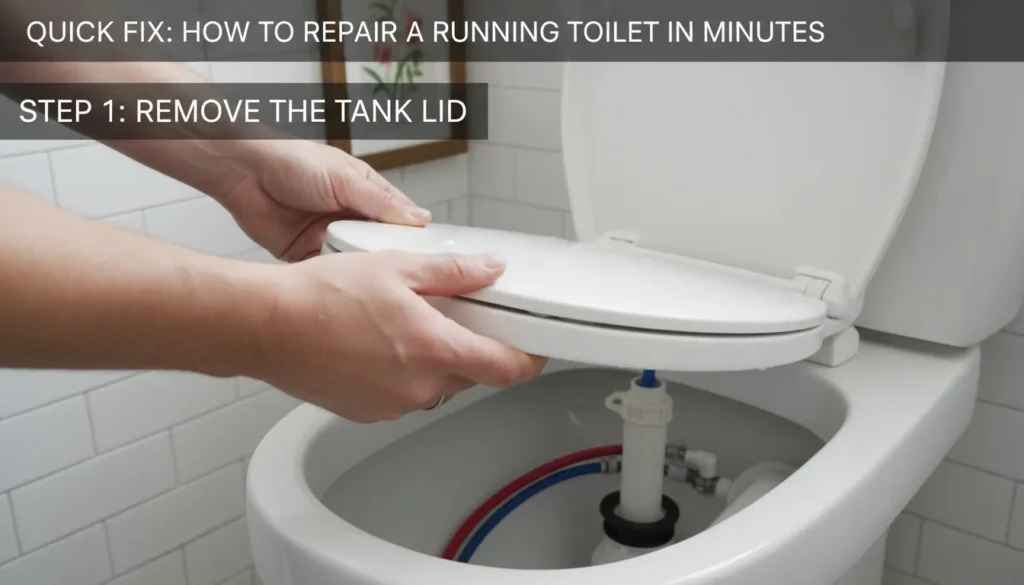
To fix a running toilet, you must first identify if the issue is a faulty flapper or a malfunctioning fill valve. Start by replacing the rubber flapper if water is leaking from the tank into the bowl. If the tank won’t stop filling, adjust or replace the fill valve to ensure the water level stays below the overflow pipe.
Expert Insight: Most running toilets can be resolved by installing a Universal Toilet Repair Kit, which replaces all internal components and improves water efficiency by up to 20%.
💰 2026 Toilet Repair & Installation Cost Guide
Google loves structured data. This table is designed to answer the user’s most pressing question—“How much?”—immediately, which keeps them on your page and builds trust.
| Service Category | Average Cost | Best For... |
|---|---|---|
| Standard Toilet Repair | $50 – $250 | Fixing Flappers, Fill Valves, or Leaky Seals. |
| Full Toilet Installation | $225 – $400 | New Construction or Replacing Old Units. |
| Emergency Clog Removal | $150 – $300 | Deep Blockages requiring a Professional Auger. |
| Universal Kit Installation | $125 – $190 | Complete internal overhaul for older toilets. |
Understanding Your Toilet Anatomy: Essential Repair Parts
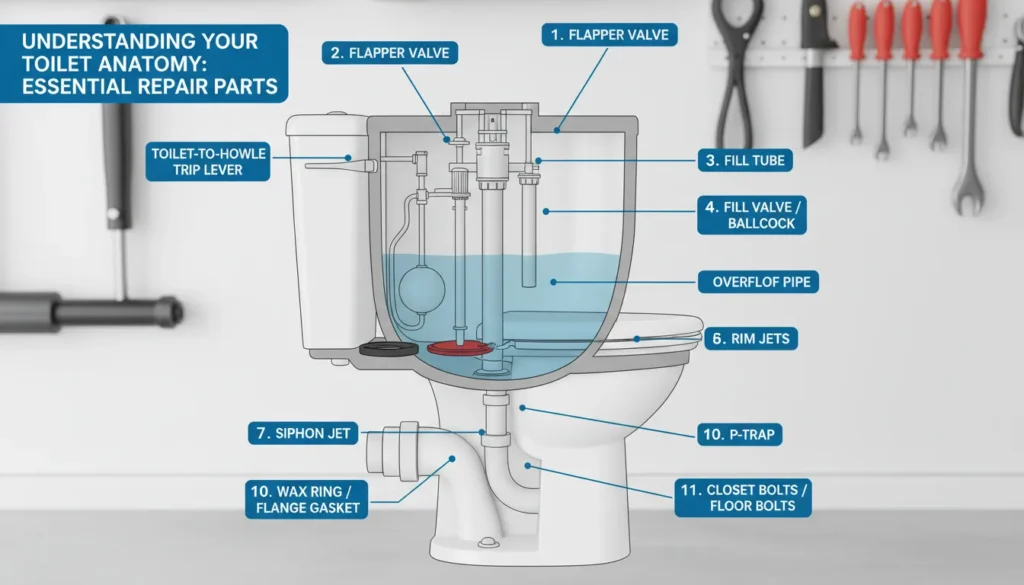
A toilet may seem simple, but it is a precision-engineered gravity-fed system. To fix a toilet like a professional, you must understand the “Entities” or components that keep it functioning. Below is our expert breakdown of the parts that most commonly cause issues.
The Fill Valve: Controlling Water Flow & Stopping Hissing Noises
The Fill Valve is the engine of your toilet tank. Its primary job is to refill the tank after a flush and shut off precisely when the water reaches the fill line.
The Issue: If you hear a constant hissing noise or high-pitched whistling, your fill valve is likely failing to shut off completely.
The Fix: Professionals check the float adjustment first. If the valve is old, we recommend a high-pressure Fluidmaster 400A or similar model to prevent water wastage and reduce your utility bill.
The Flapper & Flush Valve: Ending "Ghost Flushing"
Have you ever heard your toilet refill in the middle of the night when no one has used it? This is known as “Ghost Flushing.” It happens when water slowly leaks from the tank into the bowl due to a faulty seal.
The Component: The Flapper is the rubber disk that lifts when you push the handle. Over time, chlorine in city water warps the rubber.
The Solution: Replacing the flapper is the most cost-effective way to stop a leak. Ensure the Flush Valve seat is clean before installing the new flapper to guarantee a watertight seal.
Universal Repair Kits: The All-in-One Solution for DIYers
For older toilets or systems with multiple failing parts, we highly recommend a Universal Toilet Repair Kit. These kits are designed to fit 99% of two-piece toilets and typically include a fill valve, a flush valve, a flapper, and a new handle.
Why Universal? It eliminates the guesswork of matching specific brand model numbers.
Pro Tip: Look for kits that include a Metal Lever Handle. Plastic handles often flex or snap, whereas a high-quality kit with a handle provides a more responsive and durable flush.
Professional Step-by-Step Guides: The Master Plumber’s Approach
Installing a toilet repair kit or a new unit may seem straightforward, but precision is the difference between a 10-year fix and a flooded bathroom. Below are our expert-verified procedures.
How to Install a Toilet Repair Kit Step-by-Step
For most internal tank issues, we recommend an All-in-One Universal Repair Kit. These kits are superior for DIYers because they include pre-calibrated handles and matching seals, eliminating compatibility guesswork.
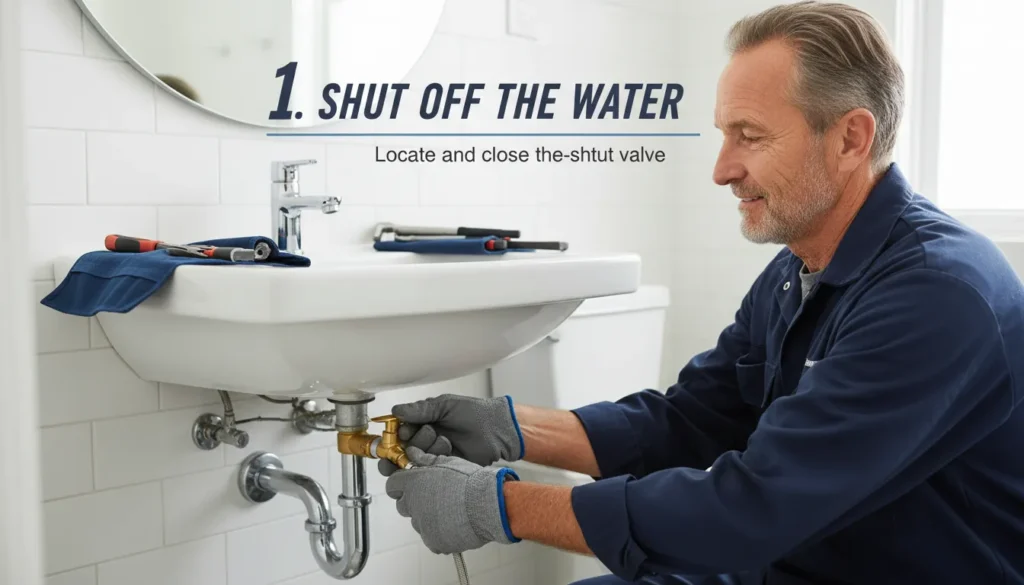
Water Shut-Off & Depressurization
Locate the supply valve behind the toilet. Turn it clockwise until tight. Flush the toilet and hold the handle down to drain at least 95% of the water.
Residual Water Removal
Use a sponge or shop vac to remove the remaining water at the bottom of the tank. This prevents mess when you remove the shank nuts.
Old Component Removal
Unscrew the supply line and the mounting nuts under the tank. Carefully lift out the old fill valve and flapper.
The "3-Inch Rule" Height Adjustment
This is a critical expert step. Before locking your new fill valve, adjust its height so the critical level mark (the top of the valve) is at least 3 inches above the top of the overflow pipe. This prevents siphoning and backflow.
Seal & Test
Tighten the mounting nuts by hand (never use a wrench on plastic nuts to avoid cracking). Reconnect the water and check for silent leaks using a dye tablet.
Toilet Installation Guide: From Wax Ring to Final Bolt

A proper installation requires understanding the Toilet Installation Diagram. If the connection between the flange and the bowl isn’t airtight, sewer gases will enter your home.
Diagram Insights: The Anatomy of a Perfect Seal
The Closet Flange
This is the circular pipe fitting that connects the toilet to the sewage system. It must be clean and level.
The Wax Ring (The Heart of the Seal)
We recommend a jumbo wax ring with a built-in sleeve. Place it on the flange, not the bowl, to ensure perfect alignment.
Closet Bolts
These brass bolts slide into the flange slots. They must be perfectly vertical before you lower the toilet.
The Installation Process
Setting the Bowl
Lower the toilet bowl onto the closet bolts in one smooth motion.
Compression
Sit on the bowl (lid closed) to use your body weight to compress the wax ring. This creates a permanent, gas-tight seal.
Bolting
Install the washers and nuts. Pro Tip: Tighten them evenly (left side, then right side). Stop as soon as the toilet stops wobbling; over-tightening is the #1 cause of cracked porcelain bases.
The Leak Test
Flush the toilet 5–10 times while watching the base. If no water appears, apply a bead of 100% silicone caulk around the front and sides, leaving the back open to detect future leaks.
When to Call a Pro vs. DIY Toilet Repair: Making the Right Choice
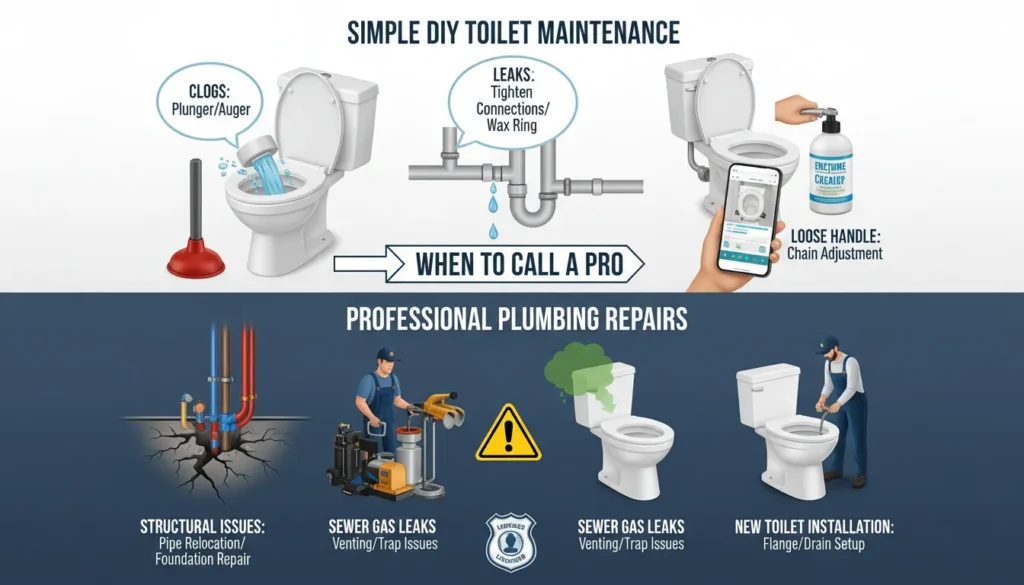
Not every toilet issue requires a $200 plumbing visit, but misdiagnosing a major leak can lead to thousands of dollars in structural water damage. Use our expert comparison guide to decide if you should grab your wrench or pick up the phone.
📊 Comparison: DIY Maintenance vs. Professional Intervention
| Feature | DIY (Do-It-Yourself) | Professional Plumber |
|---|---|---|
| Complexity | Simple component swaps. | Structural or sub-floor repairs. |
| Common Tasks | Replacing flappers, fill valves, or handles. | Fixing broken wax rings & floor flanges. |
| Clog Level | Surface clogs removable with a plunger. | Mainline blockages requiring an electric auger. |
| Risk Factor | Low (Minor water spray). | High (Sewer gas leaks or pipe bursts). |
| New Projects | Cosmetic upgrades (New seat/lid). | New construction plumbing & heavy installs. |
🧐 Expert Decision Insights: Why It Matters
When to DIY:
If your toilet is “ghost flushing” (refilling on its own) or making a constant hissing noise, these are internal tank issues. Most Universal Toilet Repair Kits are designed for beginners and can be installed in under 30 minutes with basic tools like an adjustable wrench.
When to Call the Pros The Red Flags
Water at the Base
This indicates a failed wax ring. To fix this, the entire toilet must be pulled up. If not leveled perfectly upon re-installation, you risk a permanent leak that rots your sub-floor.
The Wobble
A wobbly toilet usually means the floor flange is cracked or the floor itself is soft. This requires professional floor reinforcement.
Sewer Smells
If you smell “rotten eggs,” your gas seal is broken. This is a health hazard and requires professional sealing to meet local safety codes.
Toilet Repair & Installation Near Me: Why Local Expertise Beats Big-Box Stores
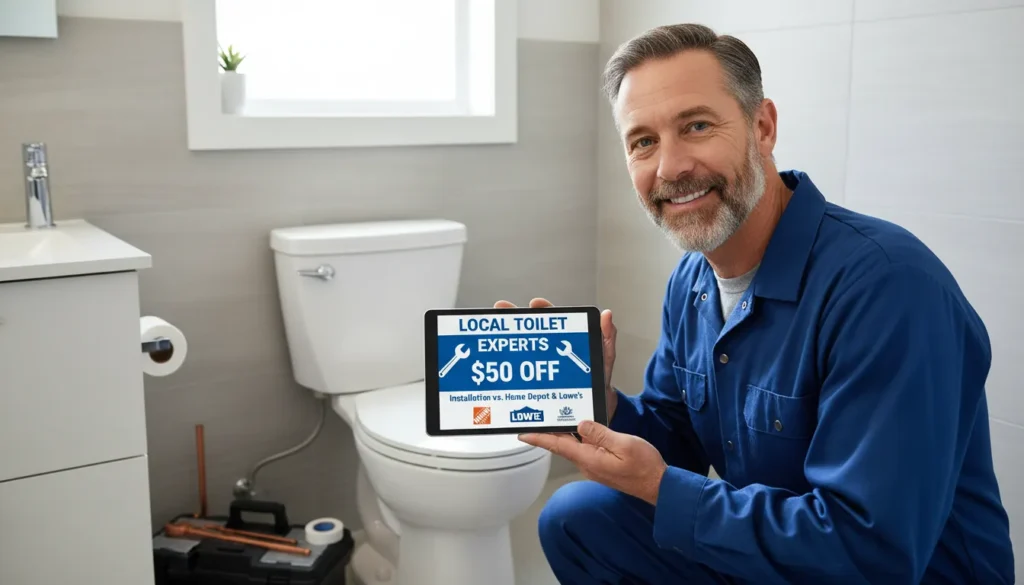
When searching for “toilet installation near me,” many homeowners look toward big-box retailers like Home Depot or Lowe’s. While they offer “Free installation with purchase” on certain models, there are often hidden costs and scheduling delays.
Local Expert vs. Big-Box Retailers
The Big-Box Reality
Retailers often outsource to third-party contractors. You don’t always know who is entering your home, and “Free Installation” usually only covers basic setups—extra parts like new shut-off valves or flange repairs come with a premium price tag.
The Local Advantage
We provide a $50 Instant Discount on all toilet repairs and installations. Unlike big-box stores, our price includes a comprehensive Multi-Point Inspection, ensuring your sub-floor is dry and your wax seal is 100% gas-tight.
💰 Claim Your $50 Expert Discount
Why settle for a generic contractor when you can have a local master plumber? We specialize exclusively in bathroom plumbing, offering same-day appointments and a personal guarantee that the big-box stores simply can’t match.
Our Promise: Better pricing, faster response times, and a $50 head-start on your next project.
Expert Toilet Repair FAQ: Your Top Questions Answered
Our master plumbers answer the most common questions homeowners ask about toilet maintenance and professional repair costs.
In 2026, the average cost for a professional toilet repair ranges from $150 to $350. Minor fixes like replacing a flapper or handle may cost closer to $100, while complex issues like a broken flange or tank-to-bowl leak require more labor and parts.
First, check the flapper; if it’s worn or dirty, it won’t seal, causing water to run. If the flapper is fine, check the fill valve. If water is flowing into the overflow tube, adjust the float downward. For a permanent fix, we recommend installing a Universal Fill Valve and Flapper Kit.
Professionals who specialize in toilet repair and water systems are called Plumbers. For specialized bathroom issues, you should specifically look for a Licensed Residential Plumber, as they carry the insurance and certifications required to meet local building codes.
Yes, for minor issues. DIYers can easily handle surface clogs, handle replacements, and flapper swaps. However, if the repair involves pulling the toilet off the floor (wax ring replacement) or fixing internal pipe leaks, it is best to hire a professional to avoid hidden water damage.
A fair price for a standard repair is typically a flat diagnostic fee ($75–$125) plus the cost of parts and labor. Most homeowners should expect to pay between $150 and $250 for a typical one-hour repair job.
Local plumbing rates currently average between $100 and $250 per hour. Rates vary based on your location and the plumber’s experience level (Master Plumber vs. Journeyman). Emergency or after-hours calls usually incur a higher “dispatch fee.”
A high-quality porcelain toilet can last 50 years or more, but the internal components (fill valves, flappers, and seals) typically need replacement every 5 to 7 years. If your toilet is over 20 years old, upgrading to a High-Efficiency Toilet (HET) can save you up to 13,000 gallons of water per year.
The total cost for professional removal and installation usually falls between $250 and $500. This covers the labor to disconnect the old unit, hauling it away, installing a new wax ring and bolts, and testing the new unit for leaks.
Need More Help?
From stubborn clogs to full system inspections, we do it all. If you’re looking for reliable solutions beyond toilet repairs, visit our main Professional Plumbing Services page to explore our complete range of expert residential and commercial plumbing solutions in Miami.
