Sprinkler Valve Repair: 7 Quick Steps to Fix Your Irrigation Leaks Without Digging
📋 Quick Guide Summary
Stop wasting money on expensive plumber calls! This expert guide reveals the “No-Dig” Top-Swap hack to fix your leaking sprinkler valves in under 10 minutes for less than $30.
What You Will Learn:
- How to fix leaks without digging your yard.
- Identifying Hunter & Rain Bird valve failures.
- Cost comparison: DIY vs. Professional service.
- Step-by-step diaphragm & solenoid replacement.
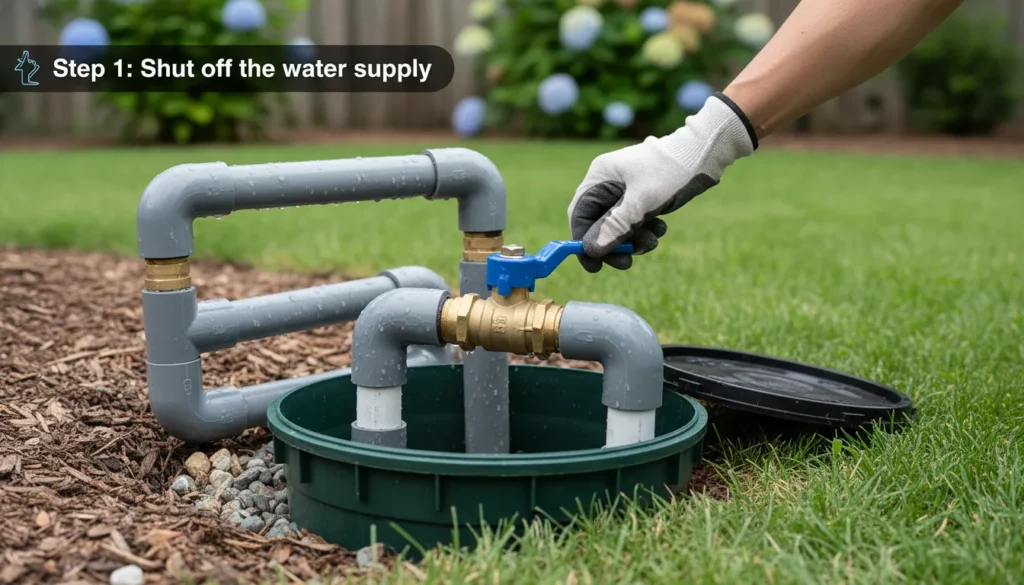
To fix a leaking sprinkler valve fast and stop wasting water, turn off the water supply and replace the internal rubber diaphragm instead of digging up the entire unit
The “No-Dig” Diagnostic: Why Your Irrigation System is Leaking
Check out this video to see how the “Top-Swap” method works in real-time before you start digging.If you see standing water in your valve box or your sprinkler heads won’t stop “weeping,” you don’t need a plumber yet. Usually, the problem is one of three things:
A Cracked Diaphragm: The rubber seal inside has a tiny tear.
Debris: A small pebble is preventing the valve from seating.
Solenoid Failure: The electrical component is burnt out.
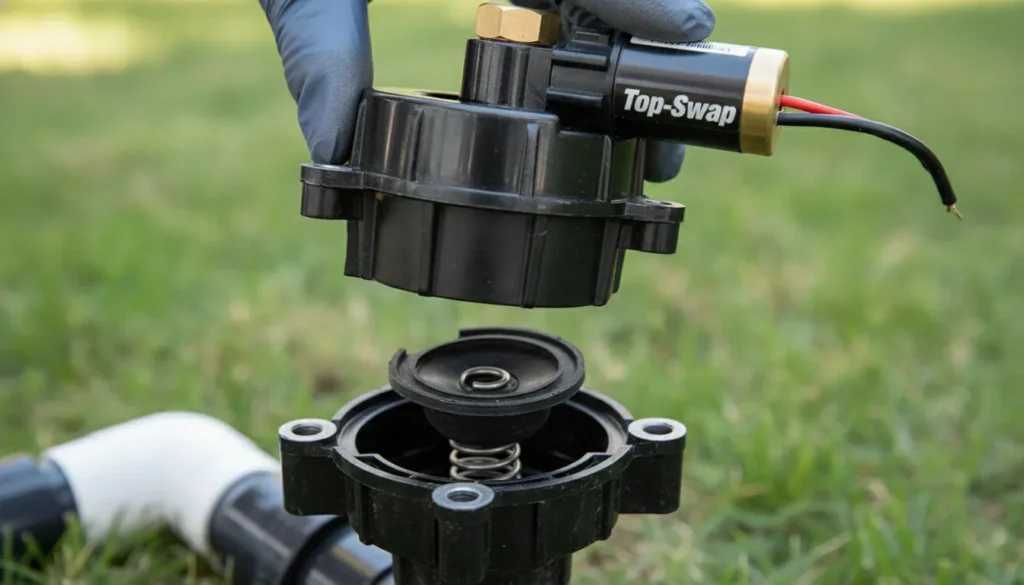
The Expert “Top-Swap” Secret
Most homeowners waste hours digging up PVC pipes. As a pro, I use the “Top-Swap” hack.
You simply buy an identical new valve, unscrew the top (the bonnet), and move the brand-new internals into your old valve body. This saves your lawn and your back.
Step-by-Step: How to Repair Your Sprinkler Valve Like a Pro
If you have identified a leak, it’s time to rebuild the valve. Remember, our goal is to avoid digging. We will use the “Top-Swap” method to replace the internal components while leaving the main valve body connected to the pipes.
1. Cleaning the Valve Internals (The Zero-Cost Fix)
Before buying new parts, check if debris is the culprit. A single grain of sand or a small pebble trapped in the valve seat can prevent the diaphragm from sealing, causing a constant leak.
Watch this guide to see how flushing the valve can solve your leak without spending a dime.
Expert Tip: Run your finger along the inside of the valve seat. It should be perfectly smooth. If you feel a nick or a crack in the plastic, the entire valve must be replaced.
2. Replacing the Diaphragm and Solenoid
If cleaning doesn’t work, you must swap the internal components. This is the core of sprinkler valve repair. You will need a screwdriver (usually Phillips head) and your replacement parts kit.
Professional Tutorial: How to correctly install a new diaphragm in Hunter and Rain Bird valves.
3. The Reassembly Checklist
When putting the bonnet (top cover) back on, follow these rules to ensure a 100% seal:
The Star Pattern: Tighten the screws in a “star” or “cross” pattern (just like the lug nuts on a car tire). This ensures even pressure across the gasket.
Check the Spring: Ensure the tension spring is seated directly in the center of the diaphragm. If it’s tilted, the valve may stay open.
Hand Tighten First: Always start the screws by hand to avoid cross-threading the plastic body.
The Cost Gap: DIY Sprinkler Valve Repair vs. Professional Service
One of the most common questions is whether you should fix the valve yourself or call a professional irrigation plumber. Understanding the costs helps you decide if the “Top-Swap” hack is worth your time.
Sprinkler Valve Repair Cost Breakdown
| Service Type | Estimated Cost (DIY) | Professional Cost |
| Solenoid Replacement | $15 – $25 | $100 – $150 |
| Diaphragm Kit | $10 – $20 | $120 – $180 |
| Full Valve Replacement | $20 – $40 | $250 – $400 |
Expert Insight: In places like Flower Mound, service call fees alone can start at $90. By spending 15 minutes on a DIY repair, you are essentially “earning” over $100 per hour in savings.
Expert Tips: Navigating Flower Mound Sprinkler Challenges
Living in Flower Mound, our irrigation systems face unique local challenges that national guides often ignore. The heavy clay soil and seasonal temperature swings in North Texas put extreme stress on underground PVC pipes and valve components.
1. The Clay Soil Factor
The expansive clay in our region shifts during dry spells and swells during heavy rain. This movement can put physical tension on your valve manifold. If you notice your valve box is leaning or the valve body looks stressed, it’s likely due to soil movement.
The Fix: Ensure your valve box is surrounded by a layer of pea gravel. This provides better drainage and acts as a “buffer” for shifting soil.
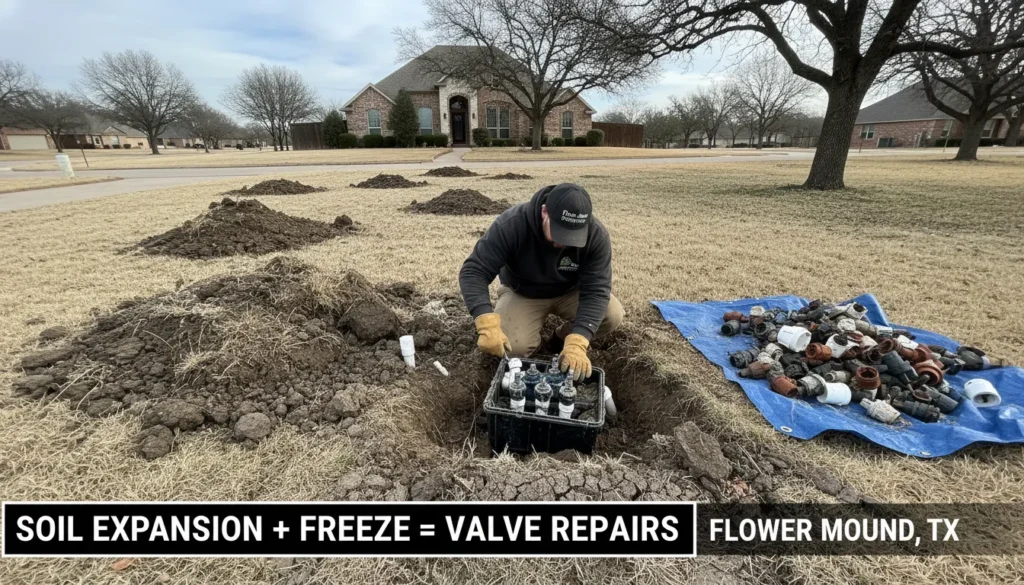
2. Winterization and Freeze Recovery
Many sprinkler valve repairs in our area happen right after the first spring thaw. If water wasn’t properly blown out with an air compressor in the winter, the water trapped inside the valve bonnet freezes and expands, causing hairline cracks in the plastic.
Pro Secret: If you see a mist or “geyser” coming from the valve box when you turn your system on in March, the bonnet is likely cracked and needs a top-swap replacement.
5 Common Mistakes to Avoid During Repair
Even a simple irrigation system valve repair can go wrong if you miss these professional details. Avoid these to ensure your system lasts for years:
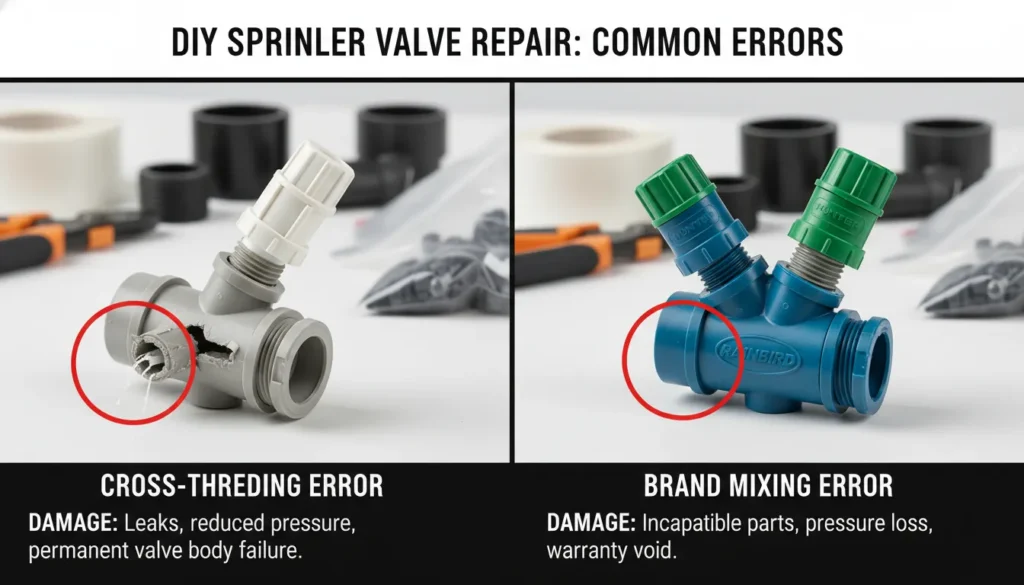
Cross-Threading the Bonnet: When putting the screws back in, start them by hand. If you use a drill too early, you might strip the plastic threads, ruining the entire valve body.
Forgetting the Spring: Every diaphragm has a tension spring. If you drop it in the mud or forget to put it back, the valve will never shut off.
Overtightening the Solenoid: The solenoid only needs to be finger-tight. Using pliers can crack the delicate plastic housing.
Ignoring the O-Ring: Always check the O-ring on the solenoid. If it’s pinched or missing, water will leak from the top of the valve constantly.
Mixing Brands: Never try to put a Rain Bird diaphragm into a Hunter valve. Even if they look similar, the PSI tolerances and screw alignments are different.
Deep FAQ: Solving Your Toughest Irrigation Questions
How much does it cost to fix a sprinkler valve?
A DIY repair kit (diaphragm and solenoid) typically costs $15–$30. If you hire a professional for irrigation system leak repair, expect to pay between $150 and $300 including labor and parts.
Can I replace just the top of a sprinkler valve?
Yes! This is known as the “Top-Swap” method. As long as the bottom valve body (which is glued to the pipes) isn’t cracked, you can install the bonnet, spring, and diaphragm from an identical new valve to save time and money.
Why is water leaking from my valve box when the system is off?
This usually indicates a weeping valve. Debris or a worn-out diaphragm is preventing the valve from closing completely. Because the main water line is always pressurized, water continues to “seep” through the valve and out of the heads or the box.
Is fire sprinkler service different from lawn irrigation?
Absolutely. If you are searching for “fire sprinkler service near me,” do not attempt a DIY fix. Fire systems are regulated by strict safety codes and require certified professionals. This guide is strictly for lawn and garden irrigation systems.