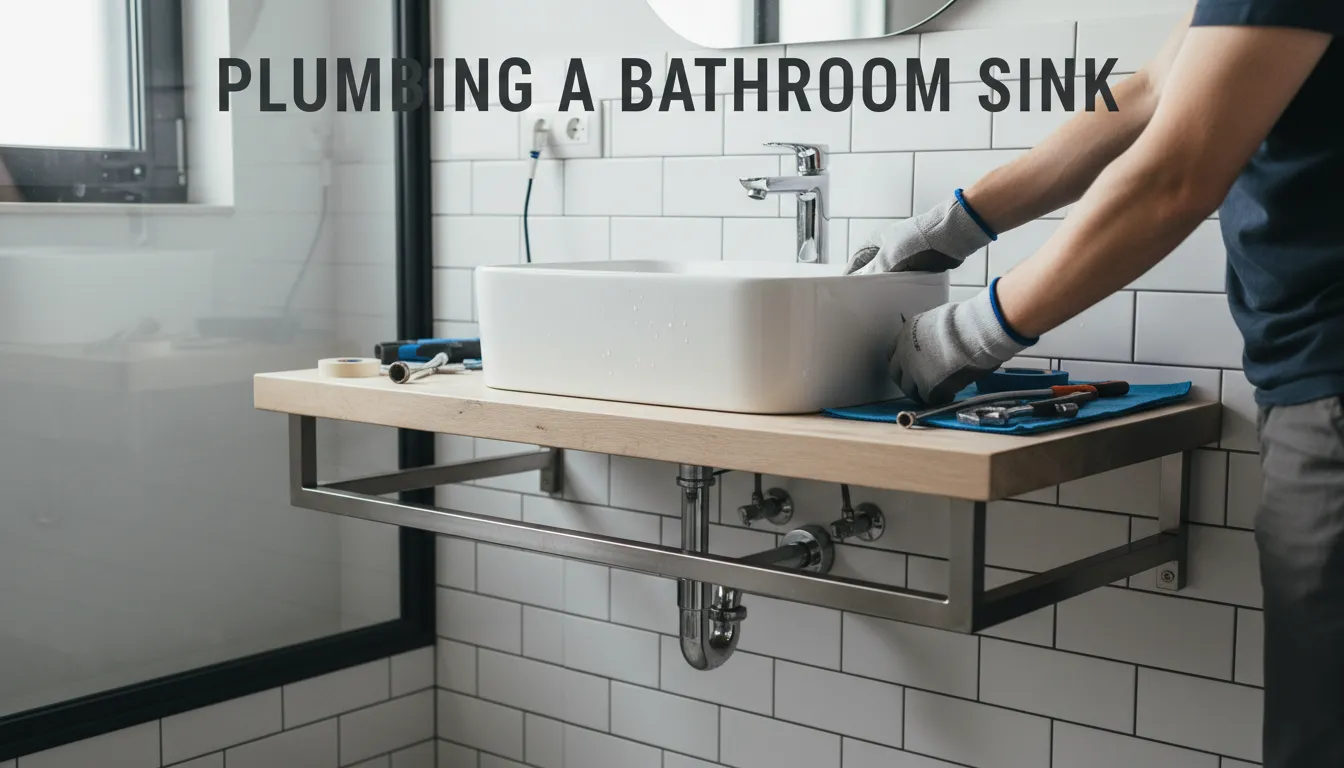
How to Plumb a Bathroom Sink: The Complete Pro-Grade Guide
Plumbing a bathroom sink requires connecting the drain tailpiece to the P-trap and securing the water supply lines to the shut-off valves. To ensure a leak-free seal, you must use a trap adapter to bridge the gap between your decorative tubular piping and the rugged DWV wall drain.
Forget the Guesswork: A Plumber’s Perspective
Most DIY guides fail because they assume your wall pipe and sink drain align perfectly. In the real world, they don’t.
Whether you are installing a modern vessel sink or a standard drop-in, the secret to a professional finish isn’t just tightening nuts—it’s mastering component alignment and selecting the right sealants.
In this guide, I’ll show you the exact “faucet-first” workflow I use to save hours on the job and how to adapt mismatched pipe sizes (like 1-1/4″ to 1-1/2″) without resorting to messy “bodge” repairs.
What we’re building today:
A code-compliant P-trap assembly.
Watertight supply line connections.
A permanent, professional-grade drain seal.
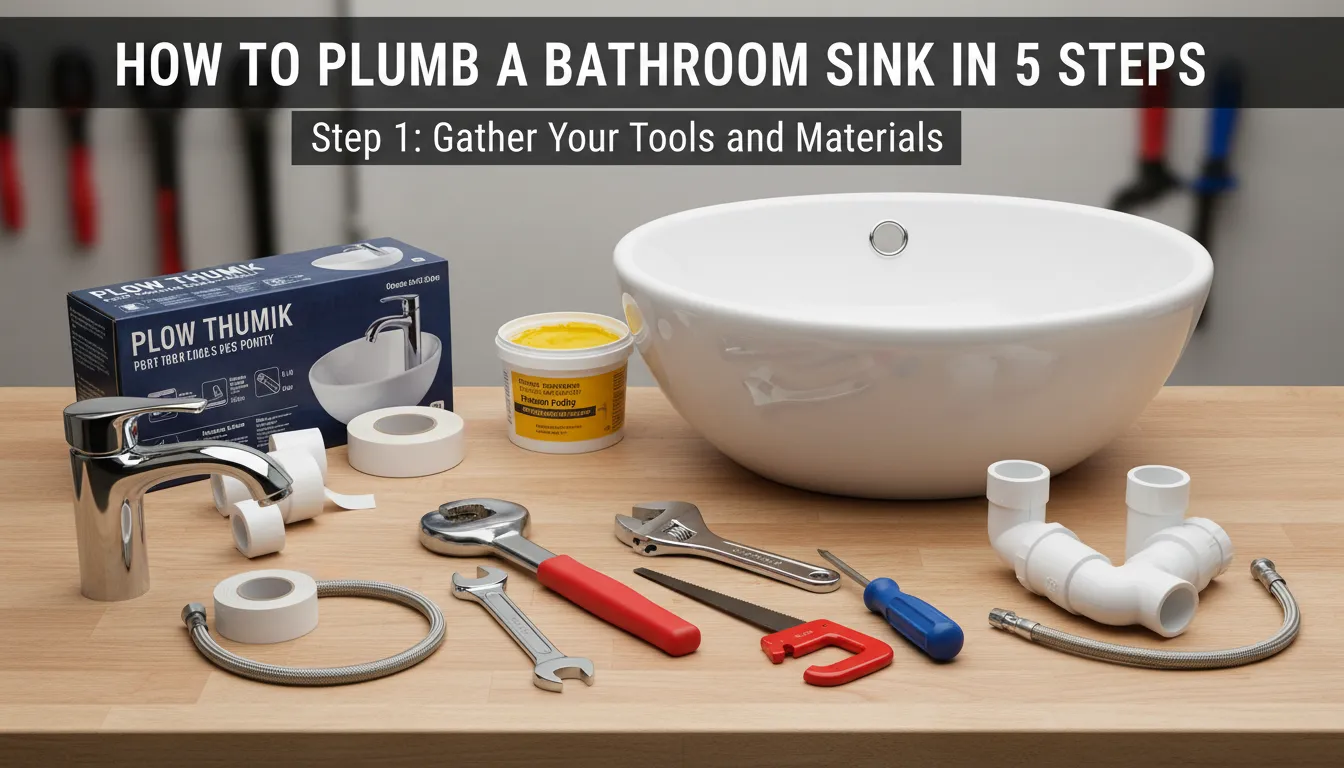
Quick Guide: Tools and Materials You Actually Need
Before you start, you must distinguish between “Wall-In” plumbing (the heavy-duty pipes behind your drywall) and “Wall-Out” plumbing (the decorative assembly under your vanity).
The “Wall-Out” Assembly (Tubular Kit)
P-Trap Kit: Usually 1-1/4″ polypropylene or brass.
Pop-Up Drain: Includes the flange, tailpiece, and lift rod.
Washers: Ensure you have beveled slip-joint washers (the tapered edge is the secret to the seal).
Flexible Supply Lines: Stainless steel braided hoses (typically 3/8″ compression x 1/2″ FIP).
The “Wall-In” Connection
Trap Adapter (Marvel Fitting): This glues to your ABS or PVC wall pipe to accept the tubular P-trap.
Reducing Washer: A 1-1/2″ x 1-1/4″ nested washer if your wall pipe is larger than your sink kit.
The Essential Tool Kit
Slip-Joint Pliers: (e.g., Channellocks) for snugging nuts.
Hacksaw or PVC Cutter: To trim the tailpiece or trap arm to length.
100% Sanitary Silicone: Better for stone or vessel sinks than traditional putty.
Plumber’s Putty: The classic choice for standard porcelain sinks.
Pro Tip: Avoid “accordion” style flexible drain pipes. They catch hair, cause clogs, and are often not code-compliant. Stick to solid tubular piping for a professional result.
How Do You Plumb a Bathroom Sink in 5 Steps?
To plumb a bathroom sink, you must connect the sink tailpiece to a P-trap, which then attaches to the wall drain via a trap adapter. This creates a water seal that prevents sewer gas from entering your home while ensuring waste flows freely into the DWV system.
The 5-Step Professional Workflow
Hardware Pre-Assembly: Install the faucet and pop-up drain on the sink while it is still accessible.
Drain Sealing: Apply plumber’s putty or silicone to the flange and secure the mounting nut under the sink.
P-Trap Alignment: Dry-fit the J-bend and trap arm to mark any necessary cuts for wall alignment.
Wall Connection: Solvent-weld a trap adapter to the wall pipe and slide the tubular arm into place.
Supply & Test: Connect braided supply lines to the isolation valves and perform a high-volume leak test.
Step 1: The “Faucet-First” Advantage (Pro Tip)
If you want to save your back and avoid working in a cramped cabinet, install your faucet and drain assembly before the sink is set.
Why Pros Install Hardware Early
Total Accessibility: You can tighten the faucet mounting nuts and supply leads with a standard wrench rather than a clumsy basin wrench.
Perfect Centering: It is much easier to align the spout and handle when you can see the sink from all angles.
Better Seals: You can apply even pressure to the drain flange, ensuring the macerator/rubber gasket seats perfectly without shifting.
The Pre-Installation Checklist
File the Ends: If you have copper leads, use a deburring tool to smooth the edges so they don’t cut the O-rings inside your faucet.
Lubricate O-Rings: A tiny dab of plumber’s grease helps the decorative hardware slide on without binding.
Step 2: Installing the Pop-Up Drain and Tailpiece
The pop-up drain assembly is the most common source of “mystery leaks.” Getting this right depends entirely on the type of sink you’ve chosen.
Choosing the Right Drain: Overflow vs. Non-Overflow
Standard Sinks: Most porcelain sinks have an overflow hole. You must use a drain body with a matching overflow port (a cutout in the threads) to prevent flooding.
Vessel Sinks: These rarely have overflows. Using a standard drain here will cause water to leak out of the threads and onto your floor. Ensure you have a non-overflow pop-up.
The Perfect Seal: Silicone vs. Putty Protocol
Plumber’s Putty: Best for standard porcelain. Roll it into a “snake,” wrap it under the drain flange, and tighten until it oozes out.
100% Sanitary Silicone: Mandatory for porcelain-on-metal, granite, or marble sinks. Putty contains oils that can permanently stain natural stone.
The Installation Sequence
Drop the Flange: Place the sealed flange into the sink’s drain hole.
The Under-Sink Stack: From underneath, slide the large rubber gasket (beveled side up) followed by the friction washer (plastic) and the mounting nut.
Tighten with Intent: Hand-tighten the nut, then give it a quarter-turn with slip-joint pliers.
Wipe the Excess: Clean away the putty or silicone “squeeze-out” immediately for a flush finish.
Step 3: Mastering the P-Trap and Wall Connection
This is where most DIYers get stuck. If your wall pipe is 2 inches and your sink kit is 1-1/4 inches, don’t panic. You just need the right reducer.
Navigating the “Mismatch”
Most modern bathroom kits use 1-1/4″ tubular piping, but many homes have 1-1/2″ or even 2″ ABS/PVC wall drains.
The Solution: Use a Trap Adapter (Marvel Fitting).
Inside the adapter, use a nested washer (a 1-1/2″ to 1-1/4″ reducer). This creates a mechanical “squeeze” seal that handles the size difference perfectly.
The “Marvel” Fitting: A Permanent Seal
Prep the Pipe: Clean the wall pipe with purple primer.
Solvent Weld: Apply ABS or PVC cement (depending on your pipe material) to the pipe and the inside of the trap adapter.
The Twist: Push the adapter onto the pipe with a quarter-turn.
Slip-Joint Setup: Once dry, slide your P-trap arm into the adapter. Tighten the compression nut over the beveled washer for a watertight, tool-free connection.
Expert Warning: Never glue your P-trap directly to the wall. It must remain removable so you can clear clogs or retrieve dropped jewelry in the future.
Step 4: Connecting Water Supply Lines and Valves
With the drainage set, it’s time to bring the water in. This isn’t just about making it flow; it’s about ensuring you can shut it off in an emergency.
Testing Isolation Valves for Proper Flow
Before hooking up your new faucet, inspect the angle stops (isolation valves) coming out of the wall.
The Pro Move: Place a small bucket under the valve and crack it open for 2 seconds. This flushes out any solder debris or mineral scale that could clog your expensive faucet’s ceramic disc cartridge.
Leak Check: If the valve drips from the stem when turned, tighten the packing nut slightly with a wrench.
Hand-Tightening vs. The “Final Quarter Turn”
Modern stainless steel braided supply lines use rubber cone washers. They do not require plumber’s tape (Teflon tape).
Hand-Tight: Thread the 3/8″ compression nut onto the valve and the 1/2″ FIP nut onto the faucet shank until hand-tight.
The Final Nip: Use a wrench to tighten the nut exactly one-quarter to one-half turn further.
Avoid the Twist: Hold the braided hose while tightening to ensure it doesn’t twist or kink, which can restrict flow and cause the inner liner to burst over time.
Common Mistakes & Code Compliance
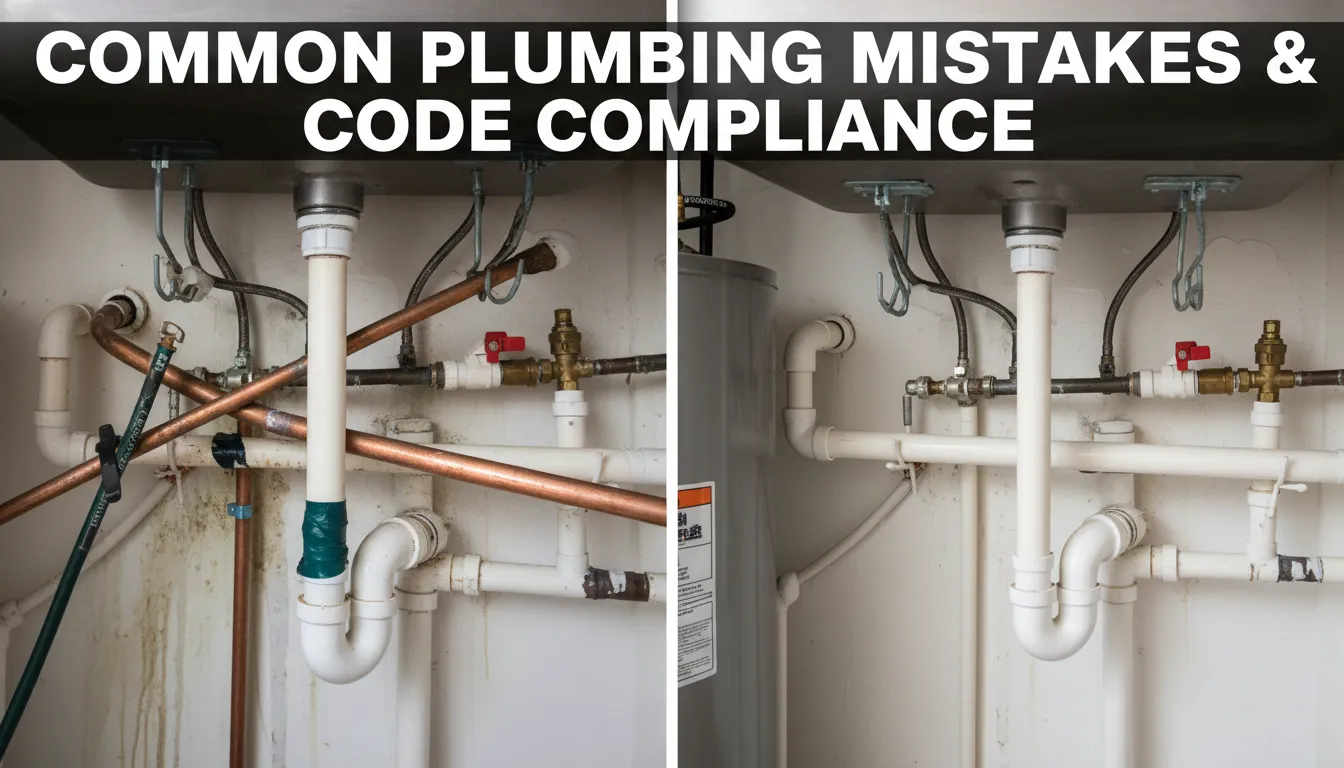
If you want your plumbing to last 20 years and pass a home inspection, you must follow the “laws of physics” embedded in the plumbing code.
Why S-Traps are Illegal (and how to fix them)
An S-trap (where the pipe goes straight down into the floor) creates a siphon that “sucks” the water out of the trap. Without that water seal, sewer gas enters your bathroom.
The Fix: If you have a floor drain, you must install an AAV (Air Admittance Valve) or a “Studor Vent” above the level of the P-trap to break the siphon.
The Horizontal Slope Rule
Your trap arm (the pipe between the P-trap and the wall) must have a downward slope of 1/4 inch per foot.
Too much slope can siphon the trap.
No slope causes standing water and grease buildup. Use your level to ensure the “bubble” is slightly off-center toward the wall.
Troubleshooting: What to Do if Your Sink Leaks
Even a pro-grade installation can have a “weeping” joint. Most leaks aren’t caused by broken parts, but by minor alignment issues or debris in the threads.
The “Ultimate Flood Test” Procedure
Don’t just run the tap. To truly test your work, you need hydrostatic pressure.
Plug the Sink: Close the pop-up stopper and fill the basin to the overflow hole.
The Sudden Drop: Pull the stopper. The sudden rush of 2–3 gallons of water puts maximum stress on every slip joint.
The Tissue Test: Run a dry piece of toilet paper over every connection. The paper will reveal “micro-leaks” that your hand might miss.
Fixing Cross-Threaded Compression Nuts
If a nut feels “crunchy” or resists turning after the first two threads, stop immediately.
The Fix: Back the nut off completely. Ensure the J-bend or tailpiece is perfectly square to the mating pipe.
The Secret: Push the pipe deep into the socket before you start threading the nut. If the pipe is crooked, the nut will never seal.
Frequently Asked Questions (People Also Asked)
Can I use a kitchen P-trap on a bathroom sink?
Technically, yes, but it’s not ideal. Kitchen traps are 1-1/2″, while most bathroom drains are 1-1/4″. While you can use a reducing washer to make it fit, a larger trap under a small sink drains more slowly and takes up valuable cabinet space.
Why does my new bathroom sink drain smell like sewer gas?
This usually means your trap seal is broken. This happens if the sink hasn’t been used in weeks (the water evaporated) or if you have an illegal S-trap that is siphoning the water away. Run the water for 10 seconds to restore the seal.
Do I need a plumber to replace a bathroom sink drain?
No. If you have slip-joint pliers and a hacksaw, you can do this yourself. By following the “Wall-In vs. Wall-Out” logic, you save the $200–$400 service fee a professional plumber would charge for a basic trim-out.
How do I align a P-trap that is off-center?
The P-trap is designed to swivel. You can rotate the J-bend 360 degrees around the tailpiece to meet the trap arm. If you are still an inch off, swap your rigid tailpiece for an offset tailpiece or a flexible extension (though rigid is always preferred for longevity).
Why Trust EZ Plumbing Repair Services for Your Home?
Plumbing a bathroom sink is a manageable DIY project when the pipes align perfectly, but real-world variables like mismatched wall drains or illegal siphoning can quickly lead to water damage. The key takeaway is simple: always prioritize a code-compliant P-trap and ensure your sealants are matched to your sink material to prevent costly “hidden” leaks behind your vanity.
While many homeowners enjoy the challenge of a weekend install, some configurations require a professional eye to ensure long-term safety. At EZ Plumbing Repair Services, our master plumbers bring years of hands-on experience to every job, ensuring your fixtures meet strict IPC/UPC safety standards and your home remains protected from sewer gas and water intrusion. We don’t just “fit” pipes; we engineer leak-proof systems designed to last a generation.
Don’t Risk a “Bodge” Job—Get it Done Right Today!
A small drip today can become a mold disaster tomorrow. If you’ve hit an alignment snag or want the peace of mind that comes with a certified professional installation, we are here to help.
Call EZ Plumbing Repair Services at +1 786 239 6529 or Book Your Expert Consultation Online to secure your home. Let us handle the heavy lifting so you can enjoy a perfect, leak-free bathroom without the stress!