How to Plumb a Water Heater: A Step-by-Step DIY Guide to Professional Installation
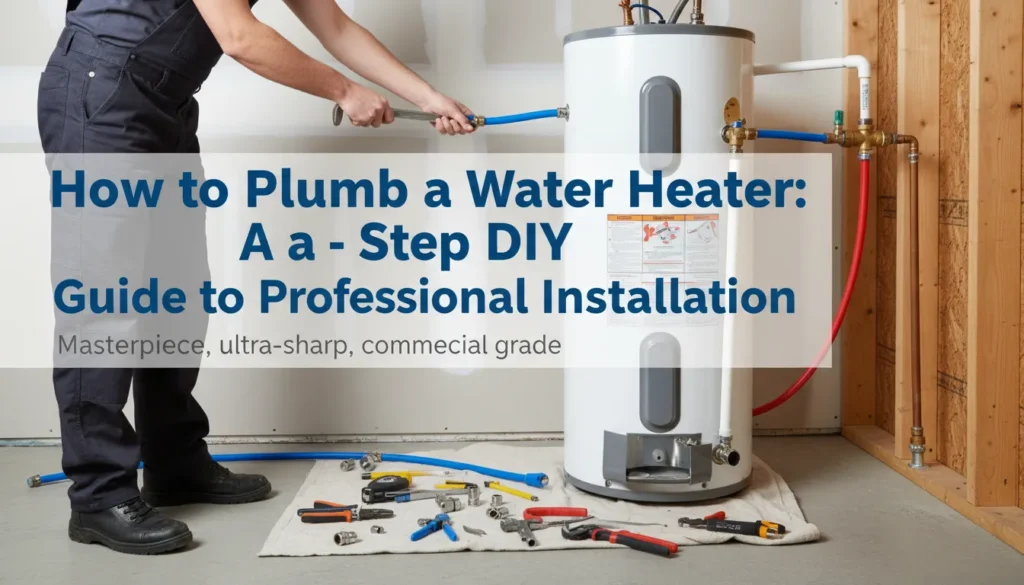
Installing a water heater is often viewed as a “pro-only” task, with contractors charging anywhere from $1,200 to $2,500 for a standard replacement. However, if you understand the core mechanics of plumbing connections, gas sediment traps, and thermal expansion, you can execute a code-compliant installation yourself for the cost of parts alone.
Whether you are dealing with a Power Vent natural gas unit or a standard Electric tank, the plumbing logic remains the same: secure the water supply, manage the pressure, and ensure a leak-proof fuel or power connection. In this guide, we reverse-engineer professional plumbing standards to help you avoid the most common beginner mistakes—like melting your dip tube or ignoring local expansion tank codes.
The Decision Matrix: Choosing Your Plumbing Method
Before you cut a single pipe, you must decide which connection method fits your skill level. Competitors often ignore the “Risk vs. Skill” ratio, but for a successful DIY job, this is where you win or lose.
| Connection Method | Skill Level | Pros | Cons |
| Copper Soldering (Sweating) | High | Permanent, professional, lowest material cost. | High risk of fire; easy to melt internal plastic tank parts. |
| Push-to-Connect (SharkBite) | Low | No heat required; fastest installation; removable. | Higher part cost; some local codes restrict “hidden” use. |
| Flexible Stainless Hoses | Medium | Handles slight misalignments; great for earthquake zones. | Can reduce flow rate if “kinked”; requires high-quality washers. |
Pro-Tip: If you choose to solder, never do it directly on the tank. The dielectric nipples (the plastic-lined connectors on top) will melt, ruining your dip tube before you even turn the water on. Always solder your adapters to a short piece of pipe away from the tank first.
The Essential “Pro-Tool” Checklist
To outperform the high-ranking forum threads, we aren’t just listing tools; we are listing solutions. Most DIYers fail because they have a “standard” wrench instead of the specific tools required for tight plumbing clearances.
Pipe Wrenches (14” and 18”): You need two. One to “hold-back” the pipe and one to turn, preventing you from snapping the gas line or twisting the copper.
Tubing Cutter: Avoid using a hacksaw. A dedicated copper tubing cutter ensures a square, burr-free cut necessary for a leak-proof seal.
Deburring Tool/Reamer: Essential for cleaning the inside of the pipe to prevent “pitting corrosion” (an entity often missed by competitors).
Non-Contact Voltage Tester: For electric heaters, this is non-negotiable for safety.
Water Meter Key & Hose: For a clean drain-down without flooding your basement.
Visual Walkthrough: Replacing Your Water Heater
Video Credit: LRN2DIY (Educational DIY Reference)
Oatey Great White Pipe Dope & Yellow Teflon Tape: White tape is for water; Yellow tape is thicker and specifically rated for Gas/Propane (NLP Entity: Gas-rated Sealant).
Step 1 — Safe Removal & The “Hidden” Weight Problem
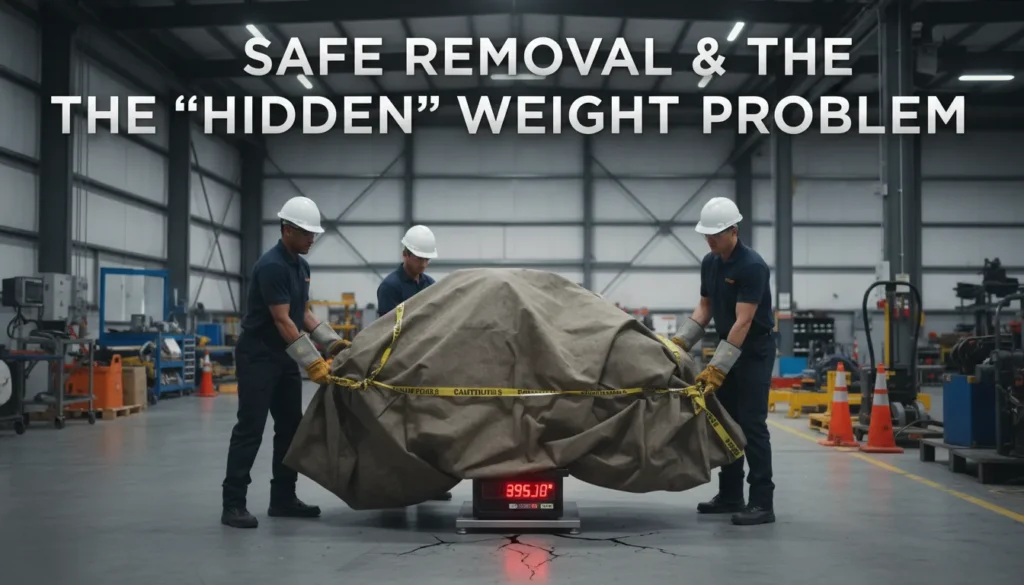
Most guides say “drain the tank.” They don’t tell you what to do when the tank refuses to drain.
The Sediment Struggle
Old water heaters accumulate calcium and lime scale at the bottom. This sediment often blocks the drain valve. If the tank is full of 50 gallons of water and 40 lbs of sediment, it weighs over 450 lbs.
How to fix a blocked drain:
The Pressure Blast: Briefly turn the cold water supply back on with the drain valve open. The sudden pressure can often “blast” the sediment out of the valve.
The Vacuum Trick: If it’s still stuck, use a wet/dry vac to suck the sediment out of the valve opening.
Disconnecting the Lines
Gas: Use your two wrenches to break the Gas Union. Immediately cap the incoming gas line with a temporary plug to prevent “ghost leaks.”
Water: If you are “sweating” (soldering) the lines, do not use your torch to melt the old solder off (as seen in Competitor #3’s failure). This introduces excessive heat to the old pipes. Instead, cut the copper 3 inches above the tank using your tubing cutter. This gives you fresh, clean copper to work with for the new install.
Preparing the New Unit (The “Anode & Nipple” Protection)

Before the new heater even touches the floor, you must prepare the “Top-of-Tank” connections. This is where 90% of DIYers cause permanent damage.
1. Addressing the Dielectric Nipple (No-Melt Strategy)
Most modern tanks come with plastic-lined dielectric nipples pre-installed. As we saw in the competitor analysis, beginners often melt these by soldering too close.
The Fix: Thread your brass or copper adapters onto the nipples first, but only “hand-tight.” Mark the orientation, remove them, solder your extension pipes to the adapters at your workbench, let them cool, and then permanent-install them onto the tank using pipe dope.
2.The “Pre-Install” Anode Check
Content Gap: No competitor mentioned this. The anode rod is a sacrificial magnesium rod that prevents the tank from rusting.
Pro-Tip: Loosen the anode rod bolt now while the tank is on the ground. These are notoriously over-tightened at the factory. If you loosen it now (and re-tighten), you’ll actually be able to replace it in 5 years, potentially doubling the life of your water heater.
Plumbing the Water Lines (Cold In, Hot Out)
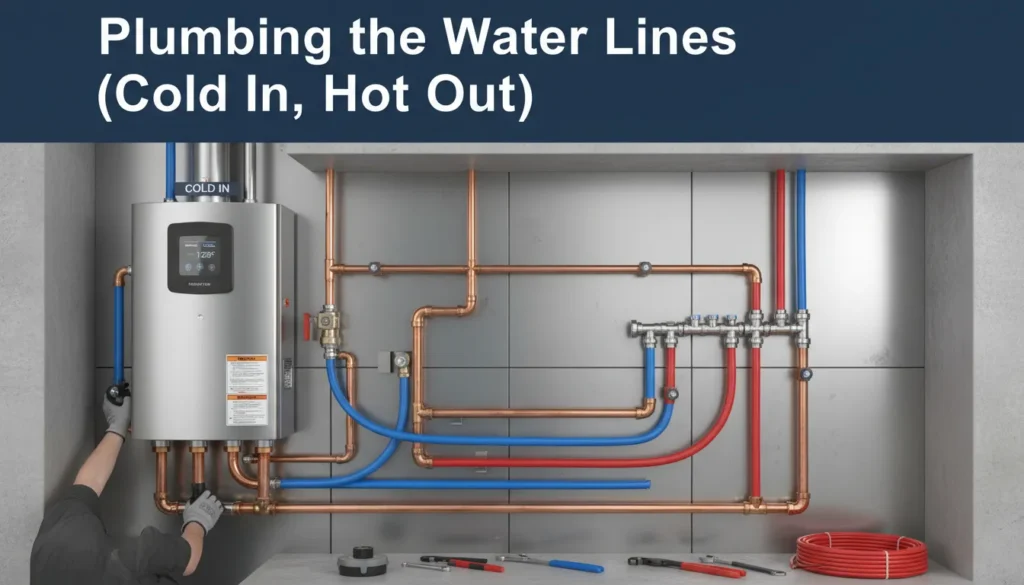
Now we connect the home’s plumbing to the heater. We must follow a specific “Safety Logic” here.
1. The Cold Water Side (The Inlet)
Shut-off Valve: Ensure you have a full-port ball valve on the cold side.
The Thermal Expansion Tank: This is a huge content gap in Competitor #1. If you have a “closed-loop” system (a check valve or pressure regulator on your main line), you must plumb an expansion tank above the heater.
Placement: Plumb it on the cold water inlet side, between the shut-off valve and the heater.
Pressure Match: Use a tire gauge to ensure the expansion tank’s air pressure matches your home’s water pressure (usually 50-60 PSI).
2. The Hot Water Side (The Outlet)
The T&P Valve (Temperature & Pressure): This is the most important safety feature. Never reuse the old one.
Discharge Pipe: Plumb a 3/4″ copper or CPVC pipe from the T&P valve downward. It must end 6 inches above the floor or drain. Never thread or cap the end of this pipe; it must be open to prevent an explosion if the tank overheats.
3. Avoiding Galvanic Corrosion
If you are connecting copper pipes to a galvanized steel tank, you must use a Dielectric Union. This breaks the electrical bridge between the two metals, preventing the “crusty” blue/green buildup that eventually eats through your pipes.
Gas Connections & The Mandatory “Sediment Trap”
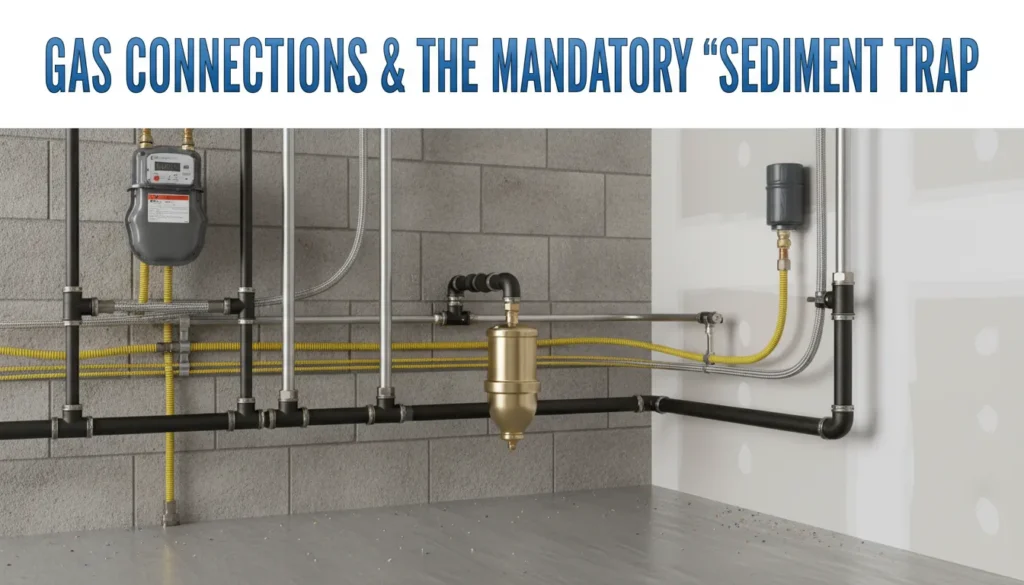
Plumbing the gas line is the most high-stakes part of the job. Most DIYers (and even some bad contractors) skip the Sediment Trap (also known as a Drip Leg), but it is a requirement under the National Fuel Gas Code (NFGC).
1. Building the Sediment Trap
A sediment trap is a “T” configuration installed at the gas inlet of the water heater. It uses gravity to catch moisture and debris before they enter the sensitive gas control valve.
The Build: Install a “T” fitting. The gas enters from the side, the top goes to the water heater valve, and the bottom is a 3-4 inch “nipple” with a cap.
Entity Focus: Use Black Iron Pipe for this assembly. Do not use galvanized pipe for gas unless specifically allowed by your local code.
2. Flexible vs. Rigid Lines
CSST (Corrugated Stainless Steel Tubing): As mentioned in Competitor #1, be gentle with the yellow CSST. Use two wrenches to avoid twisting the tubing, which can cause microscopic cracks.
Sealants: Apply Yellow Teflon Tape or Gas-rated Pipe Dope to the male threads only. Never put dope on the “flare” of a flexible connector; those rely on a metal-to-metal seal.
Venting Logic (Power Vent vs. Atmospheric)

The venting method determines how carbon monoxide (CO) leaves your home. This is where we address the Power Vent intent from the first forum competitor.
Option A: Power Vent (PVC Plumbing)
If your heater has a motor/fan on top, it is a Power Vent.
Plumbing the Vent: Use Schedule 40 PVC. Ensure the pipe is sloped back toward the heater (1/4 inch per foot) so that condensation drains into the collector and doesn’t sit in the pipe.
Sealing: Use PVC Primer and Cement. A single air leak here can leak CO into your basement.
Option B: Atmospheric (Metal Chimney)
Draft Hood: Ensure the draft hood sits level on the tank.
Clearance: Maintain a minimum 1-inch clearance from combustible materials (wood beams, drywall).
Testing: Once the heater is running, hold a match or smoke stick near the draft hood. The smoke should be “sucked” up into the vent. If it blows back, you have a dangerous “backdraft” issue.
The “Success” Checklist (Testing & Purging)
Never turn on the gas or electricity until the tank is 100% full of water.
Purge the Air: Open the highest hot water faucet in the house. Turn on the cold water supply to the heater. Wait until the water flows steadily without “sputtering.” This ensures the tank is full and prevents “Dry-Firing” (which kills electric elements in seconds).
The Leak Test: * Water: Check every joint with a dry paper towel.
Gas: Use a Leak Detection Solution (or soapy water). If you see bubbles growing, you have a leak. Tighten the fitting and re-test.
- “. Set the Safe Temperature: Once your tank is filled and all air is purged, you are ready to set the thermostat. For the best balance of safety and energy savings, follow the U.S. Department of Energy’s guide on water heater safety which recommends a setting of 120°F (49°C). This setting prevents scalding while reducing your monthly utility costs.”
Bonus — Plumbing an Under-Sink Mini-Tank (Point-of-Use)
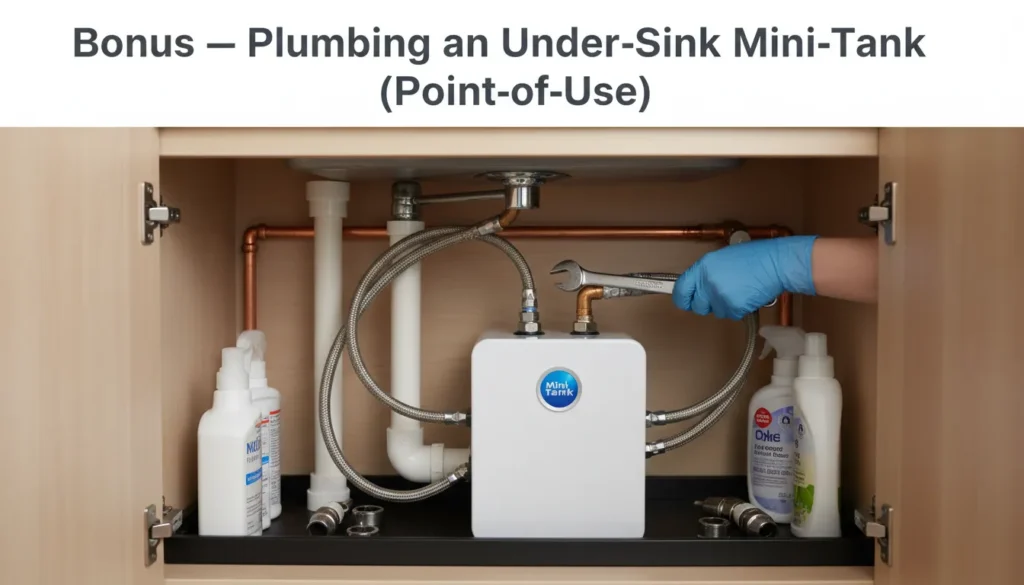
If you are plumbing a water heater to fix a hot water lag (where it takes 2 minutes for the shower to get warm), a mini-tank is your best solution.
In-Series Plumbing: Connect the hot water line from your main heater to the inlet of the mini-tank. This keeps the mini-tank topped off with pre-heated water.
The Check Valve Requirement: As noted in our competitor gap analysis, mini-tanks often lack internal check valves. Install one on the inlet to prevent thermal expansion from pushing hot water back into your cold-water lines.
Electrical Safety: Under-sink environments are damp. Ensure the heater is plugged into a GFCI-protected outlet.
FAQ (Driven by Google “People Also Ask”)
Q: Can I plumb a water heater with PEX?
A: Yes, but with a major catch. Most codes require at least 18 inches of copper pipe coming off the top of the heater before transitioning to PEX to prevent the heat from degrading the plastic.
Q: Why is my T&P valve dripping after I plumbed the new tank?
A: This usually indicates Thermal Expansion. If you don’t have an expansion tank (or if the pressure isn’t matched), the pressure builds up as the water heats, forcing the safety valve to leak.
Q: How do I know if my gas line is leaking if I don’t have a detector?
A: Use the “Bubble Test.” Mix 1 part dish soap with 3 parts water. Brush it on every gas joint. If a bubble grows or “foams,” you have a leak that needs immediate tightening.
Q: Do I need a permit to plumb a water heater myself?
A: In most jurisdictions, yes. A permit ensures a local inspector checks your venting and gas connections, which is vital for your home insurance validity.
Conclusion: Achieving a Code-Compliant Install with EZ Plumbing Repair Services
Plumbing a water heater is a rewarding DIY project that can save you significant money, but as we’ve explored, the margin for error is slim. From the precision required in building a gas sediment trap to the technical balance of a thermal expansion tank, every connection is a pillar of your home’s safety.
While following this guide will help you navigate the complexities of dielectric nipples and venting logic, some homeowners prefer the absolute certainty that comes with a licensed professional. Whether you hit a snag during the removal of an old, sediment-heavy tank or you want a final safety inspection to ensure your gas lines are 100% leak-proof, EZ Plumbing Repair Services is here to help.
Don’t Leave Your Safety to Chance—Contact EZ Plumbing Repair Services Today
If you’re feeling overwhelmed by the “No-Melt” soldering requirements or simply want the job done right the first time, our expert team at EZ Plumbing Repair Services provides fast, reliable, and code-compliant water heater installations. We specialize in both emergency repairs and precision upgrades, ensuring your home stays warm and your family stays safe.
Why Choose EZ Plumbing Repair Services?
Expertise: Over 20 years of experience in gas and electric water heater plumbing.
Safety First: We guarantee every connection meets local building codes and safety standards.
Rapid Response: 24/7 emergency support for when your DIY project takes an unexpected turn.
Ready to get your hot water running perfectly? > Click Here to Schedule Your Service with EZ Plumbing Repair Services or call us directly at (786) 239-6529 for a free estimate!